
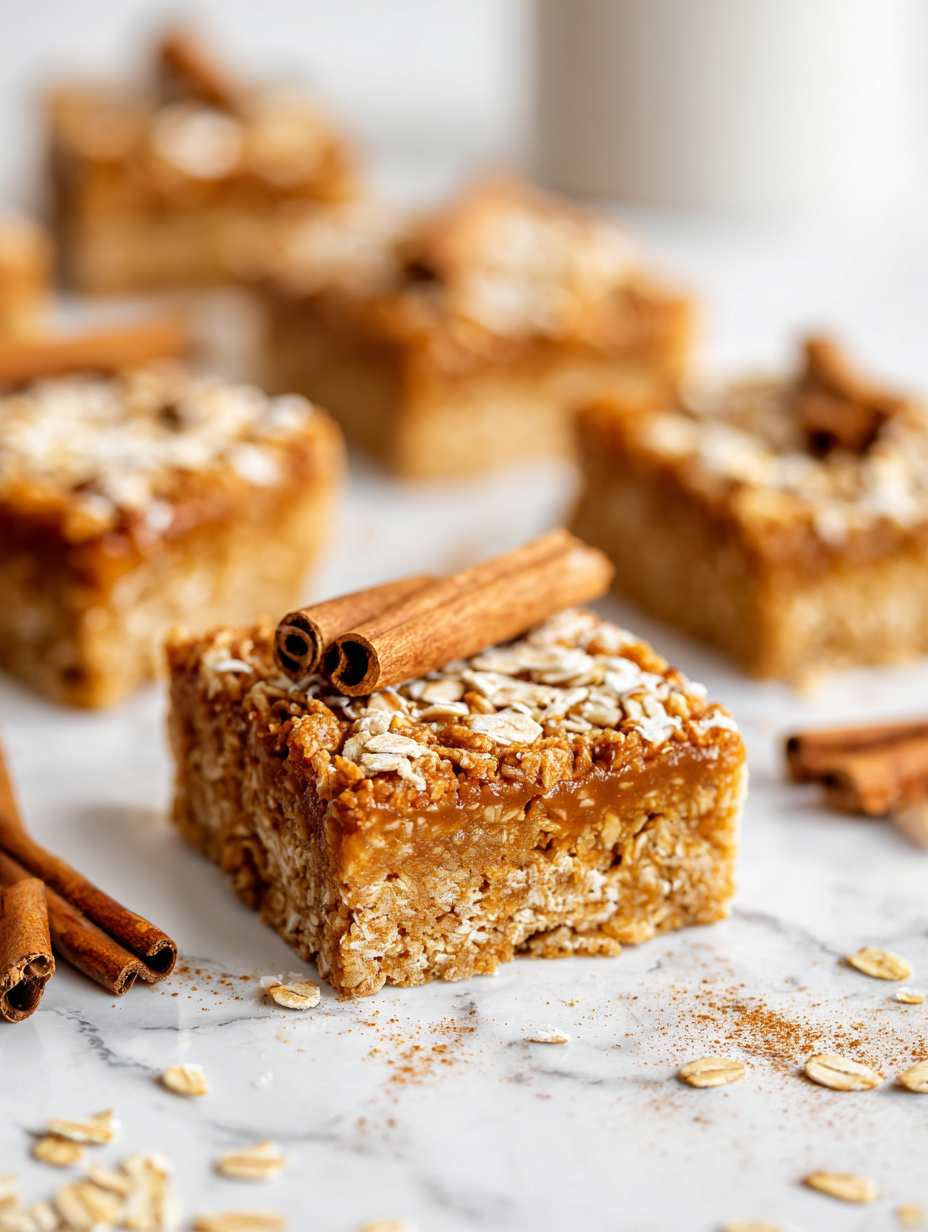
These cinnamon oat bars are my go-to when I need a quick, cozy treat that feels like a warm hug. They’re not perfect—craggy edges, a little uneven in shape—but that’s part of their charm. I love how they remind me of lazy Sunday mornings and the chaos of trying to get out the door with something sweet and satisfying in hand.
What makes these bars special isn’t just the cinnamon aroma that fills the kitchen, but how forgiving they are. No fancy ingredients, just oats, a bit of butter, and a good splash of honey. They’re the kind of thing I make in a rush, mess and all, and end up craving again the very next day.
Focusing on how these bars serve as a nostalgic, homemade comfort that’s perfect for busy mornings or unexpected guests, highlighting the imperfect, cozy charm of a messy, yet delicious treat.
The story behind this recipe
- This recipe came together one lazy afternoon when I was hunting through my pantry, craving something familiar but with a little twist. I realized I’d been making these bars since college, a quick fix for busy mornings or when friends unexpectedly dropped by. They’re a bit rough around the edges, but somehow that makes them feel more genuine, more comforting.
- I remember the first time I added a splash of vanilla and a handful of chopped nuts—suddenly, they felt like a treat I’d want to share with others, not just stash away for myself. Over the years, I’ve tweaked the spice levels and sweetener, but the core remains simple and honest. It’s a recipe born out of necessity, chaos, and a love for the imperfectly perfect.
- heading
- Story Behind This Recipe
Key ingredients and tips
- Old-fashioned oats: I love the chewiness they bring, and they give a hearty texture. If you want them softer, try quick oats, but they lose some of that rustic bite.
- Cinnamon: It’s the soul of these bars, filling the air with that warm, spicy aroma. Feel free to add a pinch of nutmeg or allspice if you’re feeling adventurous.
- Honey: I use honey for sweetness and that slight stickiness that helps hold everything together. Maple syrup works too, but it adds a different, more floral note.
- Butter: It’s the base of richness here, melting into the oats and caramelizing slightly in the oven. For dairy-free, coconut oil works but adds a subtle coconut scent.
- Brown sugar: It deepens the flavor with caramel notes. If you want a less sweet version, cut back a bit or substitute with coconut sugar for a richer, molasses-like flavor.
- Nuts (optional): Chopped walnuts or pecans add crunch and contrast. Toast them lightly beforehand for extra flavor and aroma, but skip if you prefer a nut-free version.
- Vanilla extract: Just a splash elevates the whole thing, adding warmth and depth. If you don’t have any, a dash of almond extract can be an interesting twist.
Spotlight on key ingredients
Old-fashioned oats:
- I love their chewy texture and rustic bite. They soak up flavors but stay hearty.
- Cinnamon: It’s the warm, spicy heart of these bars, filling the kitchen with a cozy aroma. Adjust for more heat or subtlety.
Cinnamon:
- Honey: It’s the sticky glue that binds everything, adding sweetness and a slight floral scent. It caramelizes nicely in the oven.
- The aroma intensifies as it bakes, spreading a comforting, spicy warmth that’s impossible to ignore.
Notes for ingredient swaps
- Dairy-Free: Swap butter for coconut oil. It’ll add a subtle coconut aroma, but the bars will still be rich and chewy.
- Sweetener Alternative: Use maple syrup instead of honey. It brings a deeper, caramel-like flavor and slightly softer texture.
- Gluten-Free: Replace oats with certified gluten-free oats. The texture stays hearty, just make sure they’re processed in a gluten-free facility.
- Nut-Free: Omit nuts altogether or add seeds like sunflower or pumpkin for crunch. Keeps it safer for nut allergies.
- Brown Sugar: Substitute with coconut sugar for a richer, molasses note. It’s less sweet but adds depth.
- Spice Level: Add a pinch of nutmeg or allspice along with cinnamon for a more complex aroma and flavor.
- Texture Boost: Mix in shredded coconut or chopped dried fruit for extra chewiness and bursts of flavor.
Equipment & Tools
- 8×8 inch baking dish: To hold and shape the bars during baking.
- Parchment paper: To prevent sticking and make removal easier.
- Small saucepan: To melt butter and mix with honey smoothly.
- Spatula: To stir ingredients and press mixture evenly.
- Sharp knife: To cut the cooled bars cleanly.
Step-by-step guide to cinnamon oat bars
- Preheat your oven to 180°C (350°F). Line an 8×8 inch baking dish with parchment paper—this makes the bars easier to lift out later.
- In a large bowl, combine 1 ½ cups old-fashioned oats, ½ teaspoon cinnamon, and a pinch of salt. Mix well to distribute evenly.
- Melt ½ cup unsalted butter in a small saucepan over medium heat or in the microwave in short bursts. Once melted, stir in ¼ cup honey and 1 teaspoon vanilla extract until smooth.
- Pour the wet mixture over the dry ingredients. Stir until all the oats are coated and the mixture feels sticky and holds together when pressed.
- Transfer the mixture to your prepared baking dish. Use the back of a spoon or a spatula to press down firmly, spreading evenly. This is key for that chewy, dense texture.
- Bake for 20-25 minutes. The edges should turn golden and smell warm and toasty—keep an eye on it after 20 minutes to prevent over-browning.
- Once baked, remove from oven and let cool in the pan for about 10 minutes. Then, lift out the whole slab using the parchment paper and transfer to a wire rack.
- While still slightly warm, cut into squares or rectangles with a sharp knife. Be gentle, these are crumbly until fully cooled.
- Allow the bars to cool completely at room temperature—about 30 minutes—before storing or serving. This helps them set up and keeps them from crumbling.
Let the bars cool completely on a wire rack before cutting. Store in an airtight container at room temperature for up to 4 days, or freeze for longer storage. Reheat briefly in the microwave if you want a warm treat—just a few seconds until fragrant and slightly gooey again.
How to Know It’s Done
- Edges are golden and smell toasted.
- The bars feel firm but not hard when pressed gently.
- When cooled, they hold their shape without crumbling excessively.
Cinnamon Oat Bars
Ingredients
Equipment
Method
- Preheat your oven to 180°C (350°F). Line your 8x8 inch baking dish with parchment paper, leaving overhang for easy removal.
- In a large bowl, combine the oats and cinnamon, then stir to distribute the spice evenly.
- In a small saucepan, melt the butter over medium heat until bubbling gently, then remove from heat.
- Stir in the honey and vanilla extract into the melted butter until smooth and fragrant.
- Pour the warm mixture over the oats and cinnamon, then stir until all the oats are coated and the mixture feels sticky.
- Transfer the mixture to your prepared baking dish and press down firmly with the back of a spatula to create an even, compact layer.
- Bake in the oven for 20-25 minutes, until the edges are golden and the aroma is warm and toasty.
- Remove the baking dish from the oven and let the bars cool in the pan for about 10 minutes, allowing them to firm up slightly.
- Using the parchment overhang, lift out the entire slab and transfer it to a wire rack to cool completely for about 30 minutes.
- Once cooled, cut into squares or rectangles with a sharp knife. Handle gently, as they can be crumbly until fully cooled.
- Enjoy these rustic, chewy cinnamon oat bars as a comforting snack or breakfast treat, storing leftovers in an airtight container at room temperature for up to 4 days.
Pro tips for perfect cinnamon oat bars
- Use fresh oats for better chew and texture, old oats can be a bit dull.
- Toast the oats lightly before mixing to enhance their nutty flavor.
- Melt butter and honey together until just bubbling—this creates a richer, more cohesive mixture.
- Press the oat mixture firmly into the pan to ensure even baking and chewy consistency.
- Keep an eye on the edges when baking; they can brown quickly—cover with foil if needed.
- Cool the bars completely before slicing to prevent crumbling and to set their shape.
- Store in an airtight container at room temperature for up to 4 days for best freshness.
Common mistakes and how to fix them
- FORGOT to check oven temperature → Use an oven thermometer for accuracy.
- DUMPED the mixture before pressing → Ensure mixture is evenly pressed for consistent baking.
- OVER-TORCHED the edges → Cover with foil if edges brown too quickly.
- MISSED cooling time → Allow bars to cool fully for clean slicing and texture.
Quick fixes and pantry swaps
- If mixture seems too dry, splash a little more honey or butter to help it hold together.
- When bars crack during cutting, refrigerate for 10 minutes to firm up before slicing.
- Splash a bit of water on the edges if they over-brown quickly in the oven.
- Patch sticky spots with a sprinkle of oats and press down again to even out.
- Shield the edges with foil if they shimmer too much or brown unevenly.
Prep, store, and reheat tips
- Prepare the dry oat mixture and melt the butter-honey blend ahead; store separately in airtight containers for up to 24 hours to save time on baking day.
- Once baked and cooled completely, cut into bars and store in an airtight container at room temperature for up to 4 days, preserving their chewy texture and cinnamon aroma.
- For longer storage, freeze the bars in a single layer, then transfer to a zip-top bag. They keep well for up to 3 months and can be reheated briefly in the microwave for a warm treat.
- Reheating will intensify the aroma and soften the bars slightly, making them feel freshly baked. Check for a fragrant, warm scent and a slightly gooey center.
Top questions about cinnamon oat bars
1. How do I know when the bars are baked enough?
Look for bars that are golden around the edges and feel firm but not hard when gently pressed. They should smell warm and toasty, with a hint of cinnamon.
2. Why are my bars crumbly or falling apart?
If they seem too crumbly, try pressing the mixture more firmly in the pan before baking. For softer bars, add a touch more honey or butter.
3. How should I store leftover bars?
Store in an airtight container at room temperature for up to 4 days. For longer storage, freeze them in a single layer, then transfer to a bag and reheat briefly in the microwave.
4. Can I make these dairy-free?
Yes, substitute coconut oil for butter for a dairy-free version. It will add a slight coconut scent but still keep the bars chewy and flavorful.
5. Can I swap honey for something else?
Use maple syrup instead of honey for a different flavor profile. It will add a richer, caramel-like note and make the bars a little softer.
6. Can I add other ingredients?
Yes, you can add chopped nuts or dried fruit before baking. Toast nuts beforehand for extra crunch and aroma, or skip nuts if allergies are a concern.
7. Any tips for a better texture?
Lightly toast the oats before mixing to bring out a nutty aroma. Ensure the mixture is pressed firmly into the pan to promote even baking.
8. What if my bars burn or are dry?
If edges over-brown, cover with foil during the last few minutes of baking. If the mixture is too dry, add a splash of honey or butter.
9. How can I prevent crumbling?
For a softer texture, slightly reduce baking time or lower the oven temperature. Always cool completely before slicing to prevent crumbling.
10. What ingredients make the biggest difference?
Use fresh oats and high-quality cinnamon for the best flavor. Remember to press the mixture down firmly to ensure even baking and chewy consistency.
These cinnamon oat bars are more than just a snack; they’re a reminder that simple ingredients, combined with a bit of chaos, can create something truly comforting. Each bite carries that warm cinnamon scent and a chewy, slightly crumbly texture that feels like a homemade hug.
In a world that’s often rushing past, sometimes it’s these imperfect, cozy treats that slow us down and ground us. There’s no shame in a slightly uneven edge or a crumbly piece—those are the moments that make these bars feel real, honest, and just right for right now.