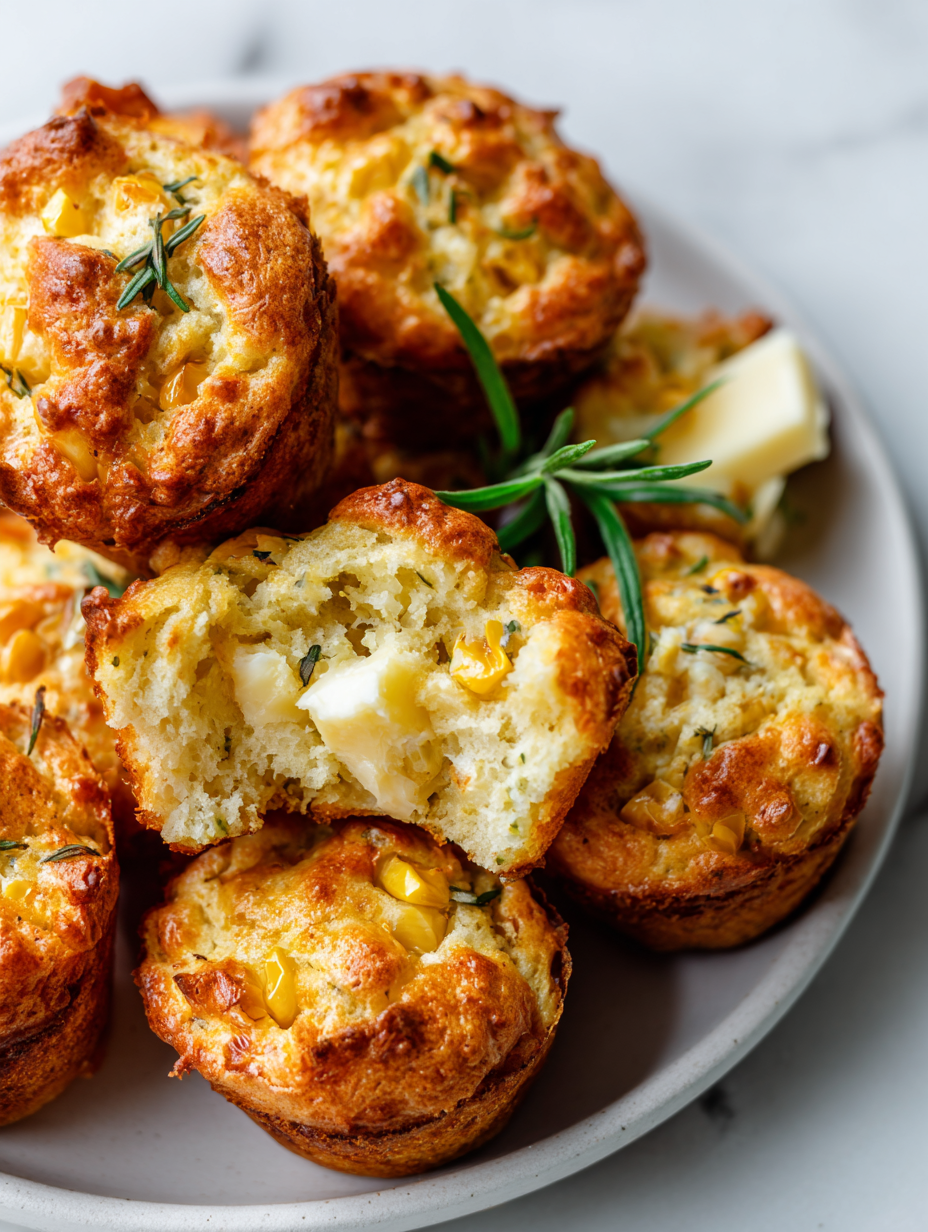
Corn muffins are one of those humble treats that hide a secret—those crispy, caramelized edges that appear when you bake just right. It’s not about the soft crumb alone; it’s about that satisfying contrast between crunch and tender crumb, the kind that makes you want to tear off a corner and savor every bite. I’ve always believed that the edges tell a story of patience and heat, transforming a simple batter into something more memorable.
Getting that perfect edge isn’t just luck; it’s about paying attention to the details—preheating the oven thoroughly, using the right pan, and giving the batter a moment to settle before baking. This recipe is my ode to those overlooked crispy bits, the parts that elevate an ordinary snack into a small, crunchy celebration. It’s a bit of a ritual, really, turning the mundane into a crispy masterpiece.
Focusing on the overlooked importance of the crispy, slightly caramelized edges that develop during baking, this recipe celebrates the texture contrast that transforms simple corn muffins into a memorable bite.
Celebrating Crispy Corn Edges
- That first crispy edge always makes me smile, like a little reward for patience.
- I remember my grandmother’s old cast-iron skillet, where these muffins got that perfect caramelized crust.
- Baking these feels like a quiet act of rebellion against overly processed snacks, simple and honest.
- There’s a nostalgic rush when I see that golden, slightly charred top—like childhood all over again.
The story behind this recipe
Corn muffins always remind me of lazy weekend mornings at my aunt’s house, where the air was thick with the smell of fresh corn and butter. I’d sit by the window, watching her effortlessly mix batter while telling stories that made the kitchen feel like a cozy, chaotic haven. Over time, I realized that those crispy edges weren’t just a happy accident—they were the secret to the perfect muffin, crispy on the outside, tender inside, with a burst of sweetness in every bite.
Corn Muffins History & Trivia
- Cornbread and muffins have roots in Indigenous American corn traditions, blending native grains with European baking techniques.
- Corn muffins became a staple in Southern kitchens during the 19th century, prized for their affordability and hearty flavor.
- The crispy edges of corn muffins are a result of high oven heat and the natural sugars caramelizing during baking.
- Variations of corn muffin recipes spread across the US, with each region adding its own twist—like jalapeños in the Southwest.
- Today, these muffins are enjoying a renaissance, appreciated not just for taste but for their nostalgic, rustic charm.
Key Ingredients and Tips
- Sweet corn kernels: I love using fresh, plump kernels for that burst of sweetness and juicy pop, but frozen works fine if you want convenience—just drain excess water first.
- All-purpose flour: It gives the muffins structure without weighing them down; if you want a slightly denser crumb, try adding a couple of tablespoons of cornmeal for extra grit and texture.
- Buttermilk: Adds tang and tenderness; if you don’t have any, a splash of milk with a teaspoon of lemon juice or vinegar works just as well—just watch that batter turn a little lumpy and inviting.
- Sugar: I prefer a touch more than some recipes call for, to balance the corn’s earthiness—adjust to your sweetness preference, but don’t skip it entirely.
- Baking soda: That quick chemical lift—make sure it’s fresh, or your muffins may turn out more dense and flat, not the golden, slightly domed tops I aim for.
- Butter: Melted, for richness and that subtle toasted aroma; if you want a lighter muffin, try a neutral oil, but you’ll miss that buttery depth and smell.
- Optional add-ins: Jalapeños, cheese, or herbs—these turn simple into memorable, add what makes your soul happy, just keep the batter balanced.
Spotlight on key ingredients
Corn kernels:
- Sweet corn kernels: I love using fresh, plump kernels for that burst of sweetness and juicy pop, but frozen works fine if you want convenience—just drain excess water first.
- All-purpose flour: It gives the muffins structure without weighing them down; if you want a slightly denser crumb, try adding a couple of tablespoons of cornmeal for extra grit and texture.
- Buttermilk: Adds tang and tenderness; if you don’t have any, a splash of milk with a teaspoon of lemon juice or vinegar works just as well—just watch that batter turn a little lumpy and inviting.
Butter:
- Melted butter: Imparts richness and that toasted aroma; if you want a lighter muffin, try a neutral oil, but you’ll miss that buttery depth and smell.
- Baking soda: That quick chemical lift—make sure it’s fresh, or your muffins may turn out more dense and flat, not the golden, slightly domed tops I aim for.
- Sugar: I prefer a touch more than some recipes call for, to balance the corn’s earthiness—adjust to your sweetness preference, but don’t skip it entirely.
Notes for ingredient swaps
- Dairy-Free: Swap buttermilk for almond or soy milk mixed with a teaspoon of vinegar—takes a bit of the tang but keeps moisture.
- Gluten-Free: Use a 1:1 gluten-free flour blend—expect a slightly denser crumb, but still tasty and tender.
- Sweetener: Maple syrup or honey can replace sugar—adds a subtle flavor twist, but reduce the liquid slightly to prevent sogginess.
- Cornmeal: Try stone-ground for a richer, nuttier flavor; instant polenta works in a pinch, with a slightly grittier texture.
- Butter: Substitute with olive oil or neutral vegetable oil—no buttery aroma, but still moist and tender.
- Fresh Corn: Use off-the-cob kernels or even char some for smoky depth—frozen works too, just drain well to avoid sogginess.
- Add-ins: Mix in chopped jalapeños, shredded cheese, or herbs—these boost flavor and texture, just keep the batter balanced.
Equipment & Tools
- Oven: To bake the muffins evenly at high heat.
- 12-cup muffin tin or cast-iron skillet: To shape and contain the batter during baking.
- Mixing bowls: To combine dry and wet ingredients separately.
- Whisk: To blend ingredients smoothly and evenly.
- Rubber spatula: To gently fold ingredients without overmixing.
- Measuring cups and spoons: For accurate ingredient portions.
- Cooling rack: To rest muffins and maintain crispy edges.
Step-by-step guide to Corn Muffins
- Preheat your oven to 220°C (430°F). Grab a 12-cup muffin tin or cast-iron skillet—something that promotes a good crust. Grease it with butter or line with parchment if using a muffin tin.
- Mix dry ingredients: whisk together 1 cup all-purpose flour, 1 cup yellow cornmeal, 1/4 cup sugar, 1 teaspoon baking soda, and 1/2 teaspoon salt in a large bowl. Set aside.
- Combine wet ingredients: in a separate bowl, whisk 2 large eggs, 1 cup buttermilk, and 1/4 cup melted butter until smooth and slightly frothy. If you don’t have buttermilk, use milk with a splash of lemon juice or vinegar—let it sit for 5 minutes.
- Add corn kernels: fold in 1 cup fresh or frozen (thawed and drained) corn kernels into the wet mixture. They should be evenly distributed but not break apart.
- Pour wet into dry: make a well in the center of the dry ingredients. Pour in the wet mixture. Gently fold just until combined—don’t overmix, or muffins get dense. The batter should be slightly lumpy.
- Scoop batter: divide evenly into your prepared pan—fill each cup about 3/4 full. Place in the oven on the middle rack.
- Bake for 18-22 minutes: until the tops are golden brown, edges are crispy, and a toothpick inserted in the center comes out clean. The smell of caramelized corn and butter should fill your kitchen.
- Check doneness: the muffins should have a crackly, slightly caramelized top, with edges that are crisp and a tender crumb. If they’re pale or soft, bake 2-3 more minutes.
- Cool slightly: let muffins rest in the pan for 5 minutes. Then, transfer to a wire rack or serve straight from the pan for that crispy edge.
- Serve warm: these are best enjoyed fresh but can be reheated. The crust softens when chilled, so reheat in a 180°C (350°F) oven for 5 minutes until the edges shimmer and regain some crispness.
Let the muffins rest for 5 minutes in the pan, then serve warm or at room temperature. For extra crunch, reheat briefly in a 180°C (350°F) oven. Drizzle with honey or butter if desired for added richness.
How to Know It’s Done
- Golden, caramelized edges with a crackly top.
- Toothpick inserted in center comes out clean.
- Edges are firm and slightly crisp, with a tender crumb inside.
Crispy Edge Corn Muffins
Ingredients
Equipment
Method
- Preheat your oven to 220°C (430°F) and prepare your muffin tin or skillet by greasing it well with butter or lining with parchment for easy removal.
- In a large bowl, whisk together the all-purpose flour, cornmeal, sugar, baking soda, and salt until evenly combined. This creates a light, airy base for your muffins.
- In a separate bowl, whisk the eggs until lightly frothy, then stir in the buttermilk and melted butter. The mixture should be smooth and slightly bubbly, filling your kitchen with a warm aroma.
- Gently fold the corn kernels into the wet mixture, distributing them evenly without breaking them apart. This adds juicy bursts of sweetness in every bite.
- Pour the wet ingredients into the bowl with the dry ingredients. Use a spatula to fold everything together just until combined; avoid overmixing to keep the batter light and fluffy, with a few lumps remaining.
- Divide the batter evenly into your prepared muffin cups or skillet, filling each about three-quarters full. This ensures even baking and crispy edges.
- Bake in the preheated oven for 18-22 minutes, until the tops are golden brown, edges are crispy, and a toothpick inserted in the center comes out clean. The smell of toasted corn and butter will fill your space.
- Once baked, remove the muffins from the oven and let them rest in the pan for about 5 minutes. This helps set the structure and keeps the edges crisp.
- Transfer the muffins to a cooling rack or serve straight from the pan, enjoying their crispy edges and tender crumb. For an extra touch, brush the tops with melted butter for a shiny, flavorful finish.
- Serve warm, perhaps with a pat of butter or honey, and savor that perfect contrast of crispy crust and soft interior in every bite.
Notes
Pro Tips for Crispy Corn Muffins
- Use a hot oven to develop crispy, caramelized edges that contrast with the tender crumb.
- Gently fold ingredients to avoid knocking out the air, ensuring light, fluffy muffins with a crispy top.
- For that extra crunch, bake until the edges just start to darken and crackle—don’t rush the timer.
- Let muffins rest for 5 minutes after baking; this helps set the structure and keeps edges crisp.
- If edges over-brown, tent muffins with foil mid-bake to prevent burning while finishing inside.
- For shiny tops, brush with melted butter immediately after baking, adding a buttery aroma and sheen.
- Use a cast-iron skillet or heavy muffin tin to promote even heat transfer and a crisp crust.
Common Corn Muffin Mistakes & Fixes
- FORGOT to preheat oven → Always preheat for crispy edges.
- DUMPED batter too quickly → Pour gently, avoid deflating batter’s air.
- OVER-TORCHED edges → Reduce heat or cover muffins if edges darken too fast.
- MISSED resting time → Rest muffins 5 minutes for setting and easier handling.
Quick fixes and pantry swaps
- If muffins are pale, increase oven temperature by 10°C (20°F) and extend baking time.
- When edges are burnt, shield with foil mid-bake to prevent over-darkening while interior finishes.
- Splash a little water on muffins if they appear dry or crumbly after baking—adds moisture and shine.
- Patch soft edges by briefly reheating in a hot oven—crisp them up again in 5 seconds of crackle.
- Shield pan with parchment or foil if your pantry swap of cornmeal makes muffins too gritty or dense.
Prep, store, and reheat tips
- Prepare the dry ingredients and mix the batter up to a day in advance; store covered in the fridge to maintain freshness and keep the flavors vibrant.
- Baked muffins can be stored in an airtight container at room temperature for up to 2 days, their crispy edges slowly softening but still flavorful.
- For longer storage, freeze muffins individually wrapped for up to 3 months; reheat in a 180°C (350°F) oven until warm and edges shimmer again.
- Reheating releases a warm, toasted aroma; check for a crispy edge and a tender crumb when warmed thoroughly—about 5 minutes in the oven.
Corn Muffins Recipe FAQs
1. Can I use frozen corn instead of fresh?
Use fresh or frozen corn kernels for the best burst of sweetness, but drained frozen works fine for convenience.
2. Can I substitute canned corn for fresh or frozen?
Yes, but reduce the added liquid slightly, as frozen corn can release extra moisture during baking.
3. How do I know when the muffins are done?
Bake until edges are golden and crispy, and a toothpick in the center comes out clean—typically 18-22 minutes.
4. Should I preheat the oven?
Preheat the oven to 220°C (430°F) for crispy edges. Use a cast-iron skillet or muffin tin for best crust.
5. How do I store leftover muffins?
To keep muffins crispy, store at room temperature for a day, then reheat in a hot oven before serving.
6. Can I make buttermilk substitute?
Use a combination of buttermilk and lemon juice or vinegar if you don’t have buttermilk; it adds tang and tenderness.
7. What’s the best way to mix the batter?
Mix dry ingredients separately and then gently fold in wet ingredients to avoid overworking the batter and making dense muffins.
8. Can I add extra ingredients like cheese or jalapeños?
Yes, you can add chopped jalapeños, shredded cheese, or herbs for extra flavor, but keep the batter balanced to prevent sogginess.
9. What if my edges burn?
Over-torched edges can be fixed by tenting the muffins with foil mid-bake or lowering the oven temperature slightly.
10. How can I make the crust crispier after baking?
For extra crispiness, brush the muffins with melted butter immediately after baking and let them rest for 5 minutes.
These corn muffins are more than just a snack; they’re a small act of rebellion against overly processed foods, with crispy edges that tell a story of heat and patience. Baking them feels like a quiet celebration of simple ingredients coming together in a warm, fragrant hug.
Sharing these warm muffins, especially when the edges crackle and the aroma fills the room, brings a little bit of my kitchen’s chaos into the world. They’re perfect for cozy mornings or lazy afternoons, where the only thing better than the taste is the memory of making them.