
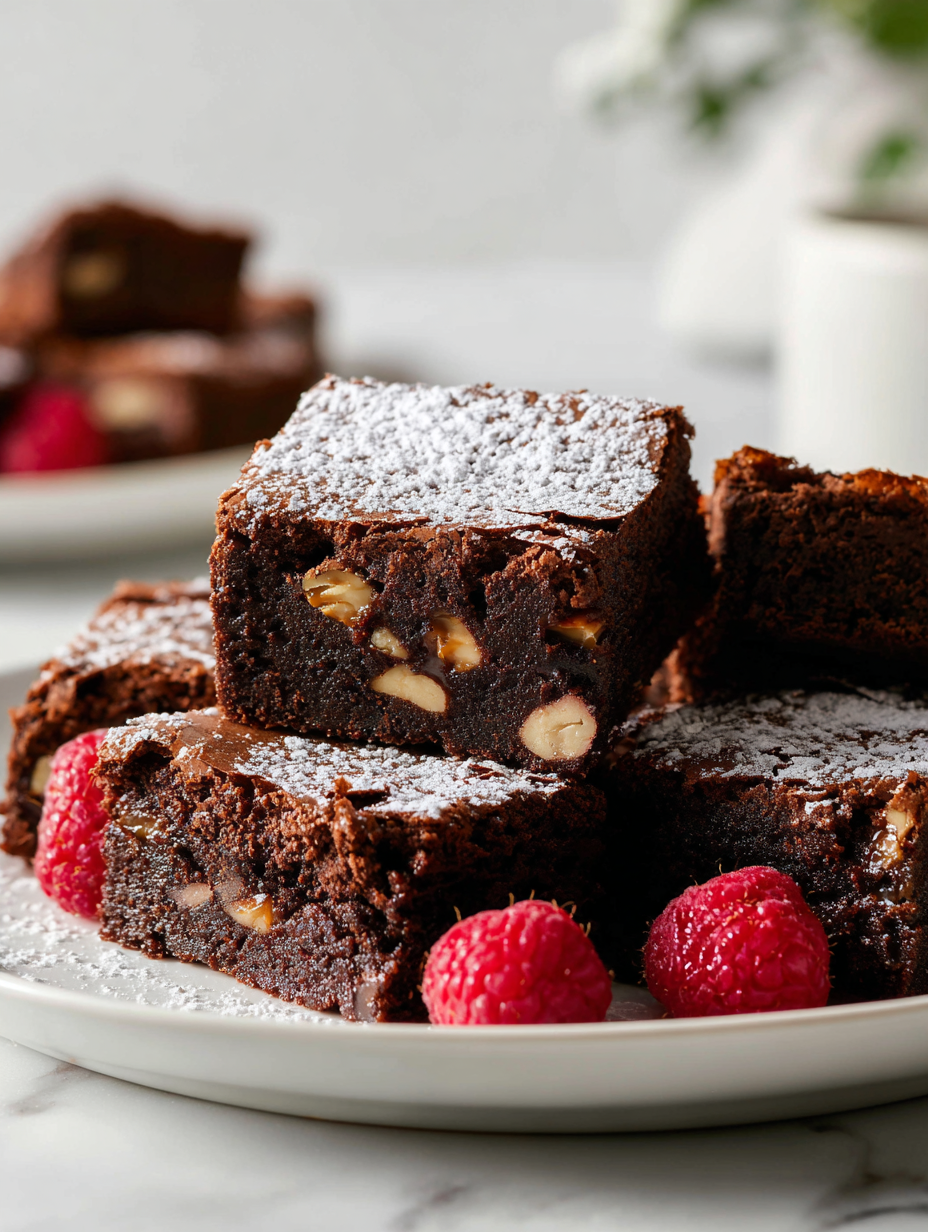
There’s something about the combination of a crispy top and a gooey, rich center that makes brownies feel like the ultimate quick fix for any craving. But lately, I’ve been craving that nostalgic bite in a more portable, breakfast-friendly form—enter these brownie bars. They’re not just dessert; they’re a portable, imperfectly perfect treat that you can whip up in a flash, even on busy mornings.
The secret is in the texture—crunchy edges giving way to a fudgy, chewy middle—that makes each bite feel special. I love how adaptable they are, too. A handful of nuts, a swirl of peanut butter, or even a sprinkle of sea salt on top can turn these simple bars into a little moment of indulgence, whenever you need it most.
Focusing on how to make rich, gooey brownie bars with a crispy top that feel like a nostalgic treat, but adapted for busy mornings and quick bites.
The story behind this recipe
- This recipe comes from a hectic weekend when I needed something quick but still comforting. I grabbed a few ingredients I had on hand and just started mixing, hoping for the best. The smell of melting chocolate and warm butter filling the kitchen reminded me of lazy Sunday afternoons, even if it was a weekday. Those first bites—crackly top, fudgy inside—made me realize how a simple tweak could turn a classic into a portable treat I’d keep coming back to.
- heading
- story_type
Ingredient breakdown: key components
- Unsweetened cocoa powder: I love the deep, earthy aroma it brings. If you want a richer flavor, bump up the cocoa by a tablespoon, but watch for bitterness.
- Bittersweet chocolate: I prefer a 70% bar, it melts smoothly and adds that intense chocolate punch. Swap with milk chocolate if you want a milder, sweeter bar, but cut back on sugar slightly.
- Butter: Creamy and rich, I use unsalted butter to control salt levels. For a dairy-free version, coconut oil offers a subtle tropical note and a crispier edge.
- Eggs: They bind everything together and give structure. If you’re out, a flaxseed swap works—just expect a slightly denser texture and a nutty flavor.
- Brown sugar: It adds moisture and a caramel hint. Light molasses can replace part of it for a more complex sweetness, giving a darker, more intense flavor.
- All-purpose flour: I stick with plain flour, but whole wheat adds a nutty depth. For gluten-free, almond flour creates a tender, slightly crumbly bar with a rich flavor.
- Vanilla extract: It amplifies all that chocolate richness. If you only have vanilla bean paste, use less—it’s more concentrated and adds specks of flavor.
Spotlight on key ingredients
Chocolate (bittersweet and chips):
- Bittersweet chocolate: I love the intense, smooth melt and deep cocoa aroma. It melts evenly, creating rich pockets of flavor.
- Chocolate chips: They hold their shape during baking, offering bursts of sweetness and gooey texture. Use high-quality chips for best results.
Butter and brown sugar:
- Unsalted butter: It provides a creamy base and enhances chocolate richness. It melts quickly, forming the glossy batter.
- Brown sugar: It keeps the bars moist and adds caramel undertones. Its moist texture helps create that fudgy crumb we crave.
Notes for ingredient swaps
- Dairy-Free: Swap butter for coconut oil or vegan margarine—your bars will still be rich, but with a subtler coconut aroma.
- Sweetener Swap: Use maple syrup or honey instead of brown sugar—expect a slightly different moisture and a hint of floral sweetness.
- Chocolate Choice: Replace bittersweet chocolate with milk chocolate for a milder, sweeter bar, but cut back on sugar slightly to balance the sweetness.
- Flour Variations: Whole wheat or spelt flour can replace all-purpose—these will add nuttiness and a denser crumb, with a slightly heartier flavor.
- Add Nuts: Incorporate chopped pecans or walnuts—these add crunch and toasty flavor, but toast them first for maximum flavor punch.
- Vegan Option: Use flax eggs (1 tbsp ground flaxseed + 3 tbsp water per egg) instead of eggs—bars will be a bit denser and more crumbly.
- Flavor Boost: A pinch of sea salt or flaky sea salt on top before baking intensifies chocolate and balances sweetness.
Equipment & Tools
- 9-inch square baking pan: Holds the batter and ensures even baking.
- Parchment paper: Prevents sticking and makes removal easy.
- Mixing bowls: Combine ingredients smoothly.
- Whisk: Beat eggs and incorporate air.
- Spatula: Fold ingredients and spread batter evenly.
- Knife or cake scraper: Cut and serve cleanly.
Step-by-step guide to brownie bars
- Preheat your oven to 180°C (350°F). Grease a 9-inch square baking pan and line it with parchment paper, leaving some overhang for easy removal.
- Gather your equipment: a mixing bowl for blending, a spatula for folding, a whisk for beating, and a baking spatula for smoothing.
- Melt 115g (4 oz) of unsalted butter in a saucepan over low heat. Once melted, remove from heat and stir in 1 teaspoon vanilla extract and 25g (1/4 cup) cocoa powder until smooth and fragrant.
- In a large bowl, whisk 2 large eggs until slightly frothy, then add 150g (3/4 cup) brown sugar. Whisk until combined and slightly thickened, about 30 seconds.
- Pour the melted chocolate mixture into the egg mixture, whisking steadily. Add 60g (1/2 cup) all-purpose flour and a pinch of salt. Fold gently until just combined—don’t overmix to keep it tender.
- Stir in 100g (3.5 oz) chopped bittersweet chocolate or chocolate chips for gooey pockets. Optional: add a handful of chopped nuts or swirl in peanut butter.
- Pour batter into prepared pan, spreading evenly with a spatula. Tap the pan on the counter to settle the batter and release air bubbles.
- Bake for 20–25 minutes. The edges should be set, but the center still slightly jiggly. The top will look crackly and slightly shiny.
- For a more fudgy texture, check at 20 minutes—if a toothpick inserted in the center comes out with moist crumbs, it’s done. For cake-like bars, bake a little longer.
- Remove from oven and let cool in the pan for at least 15 minutes. If you want clean edges, run a knife around the perimeter before lifting out using the parchment overhang.
- Transfer to a wire rack or cutting board. Slice into squares while still slightly warm for easier cutting, or wait until fully cooled for neater edges.
Let the brownies cool in the pan for 15 minutes, then lift out using the parchment edges. Slice into squares and serve slightly warm or at room temperature. For cleaner cuts, chill in the fridge for 30 minutes before slicing.
How to Know It’s Done
- Edges are golden and slightly crisp, center is fudgy but not raw.
- Crackly top with a shiny sheen indicates proper bake and moisture retention.
- A toothpick inserted in the center comes out with moist crumbs, not wet batter.
Brownie Bars
Ingredients
Equipment
Method
- Preheat your oven to 180°C (350°F). Line the baking pan with parchment paper, leaving extra overhang for easy removal.
- Melt the butter gently in a saucepan over low heat until smooth and fragrant, then remove from heat.
- Stir the cocoa powder and vanilla extract into the melted butter until well combined; the mixture will smell rich and chocolatey.
- In a large bowl, whisk the eggs until slightly frothy, then add the brown sugar and whisk until the mixture is smooth and slightly thickened.
- Pour the slightly cooled chocolate mixture into the egg and sugar, whisking steadily to create a shiny, smooth batter that smells intensely chocolatey.
- Gently fold in the flour using a spatula until just combined, being careful not to overmix, to keep the batter tender.
- Stir in the chopped bittersweet chocolate or chocolate chips, distributing evenly throughout the batter.
- Pour the batter into the prepared pan and spread it evenly with a spatula, smoothing the top for a uniform surface.
- Bake in the preheated oven for 20–25 minutes, until the top is crackly and shiny, but the center still jiggles slightly when gently shaken.
- Remove the pan from the oven and let it cool on a wire rack for at least 15 minutes. The edges will firm up while the center remains fudgy and moist.
- Use the parchment overhang to lift the bars out of the pan. Slice into squares while slightly warm or fully cooled, and enjoy!
Pro tips for perfect brownie bars
- Use high-quality cocoa powder for a deep, chocolatey aroma that permeates every bite.
- Melt chocolate gently over low heat or in short bursts in the microwave—avoid overheating to prevent seizing.
- Whisk eggs and sugar until slightly frothy—this helps create a tender, airy crumb.
- Tap the filled pan on the counter before baking to release air bubbles and ensure an even top.
- Keep an eye on the edges—when they turn golden and crackly, your bars are close to perfect.
- For fudgier bars, slightly underbake and let cool in the pan—resists cracking and keeps that gooey center.
- Chill the baked bars briefly before slicing for cleaner edges and a neater presentation.
Common mistakes and how to fix them
- FORGOT to measure ingredients precisely? Use a scale for accuracy, especially with flour and sugar.
- DUMPED in all eggs at once? Add eggs one at a time, folding gently to keep batter airy.
- OVER-TORCHED the edges? Cover with foil halfway through baking to prevent burning.
- UNDER-baked center? Extend bake time by 2-3 minutes, check for fudgy texture with a toothpick.
Quick fixes and pantry swaps
- If a crackle sound occurs, shield the edges with foil to prevent over-browning.
- When batter is too thick, splash in a teaspoon of milk and stir gently.
- Patch a greasy top by sprinkling a little powdered sugar after cooling.
- Splash a few drops of coffee into the batter for a richer chocolate flavor.
- When bars stick, rescue with a quick dip in hot water—then wipe and slice.
Prep, store, and reheat tips
- Prepare the batter up to a day in advance; keep it covered in the fridge. It firms slightly but remains lively, making spreading easier when ready to bake.
- Brownie bars can be baked and stored in an airtight container at room temperature for up to 3 days. Expect the edges to stay crisp and the center to remain fudgy.
- For longer storage, wrap bars tightly in plastic wrap and freeze up to 1 month. Thaw at room temperature for about 30 minutes before serving.
- Reheat individual slices in the microwave on medium power for about 10-15 seconds. Expect a warm, gooey center with a slightly crisp top. Do not overheat to avoid melting all the chocolate.
Top questions about brownie bars
1. Should eggs be cold or at room temperature?
Use room temperature eggs to help the batter blend smoothly and create a tender texture.
2. How do I know when the brownie bars are done?
Bake until the edges are golden and crackly, but the center still jiggles slightly for gooeyness.
3. Can I make these dairy-free?
Yes, swapping butter with coconut oil adds a slight tropical aroma and makes them dairy-free, but expect a slightly crispier edge.
4. How should I store leftover brownie bars?
Chill the bars in the fridge for 30 minutes before slicing for cleaner edges and a neater presentation.
5. Can I add toppings or mix-ins?
Add a pinch of flaky sea salt on top before baking to enhance the chocolate flavor and add a salty crunch.
6. What kind of chocolate should I use?
Use high-quality bittersweet chocolate for a rich, smooth melt. Cheaper chocolates can make the bars dull and greasy.
7. How long should I bake the brownie bars?
Bake in a preheated 180°C (350°F) oven for 20-25 minutes, checking for a shiny, crackly top and slightly jiggly center.
8. My batter is too thick, what do I do?
If the batter is too thick to spread, stir in a teaspoon of milk or water to loosen it up.
9. How can I make the bars more fudgy?
For a fudgier texture, slightly underbake and let the bars cool completely before cutting.
10. How do I freeze and reheat brownie bars?
Freeze baked bars wrapped tightly for up to a month; thaw at room temp for 30 minutes before serving.
Baking these brownie bars is a small act of rebellion against the rush of everyday life. The smell of melting chocolate and toasted edges makes the house feel warmer, even on the busiest mornings.
They remind me that quick, honest treats can still carry a little bit of comfort and nostalgia, no matter how hectic things get. Sharing a slice is a simple way to reconnect, one bite at a time.