
There’s something about the swirled marble pattern in this pound cake that feels like baking a tiny piece of art. It’s a bit of a magic trick — mixing two batters into one, creating that striking contrast of dark and light, all while the aroma of vanilla and cocoa fills the kitchen. It’s almost too pretty to cut, but honestly, that marbled swirl makes each slice feel like a small celebration.
This recipe isn’t just about looks, though. It’s about the joy of getting those two flavors to dance together — the richness of butter and sugar, balanced by the bittersweet hint of cocoa. Every time I bake it, I remember why I fell in love with baking in the first place: simple ingredients, transformed into something unexpectedly beautiful and comforting. Plus, it’s foolproof enough to make on a quiet Sunday or to surprise someone with a little edible art.
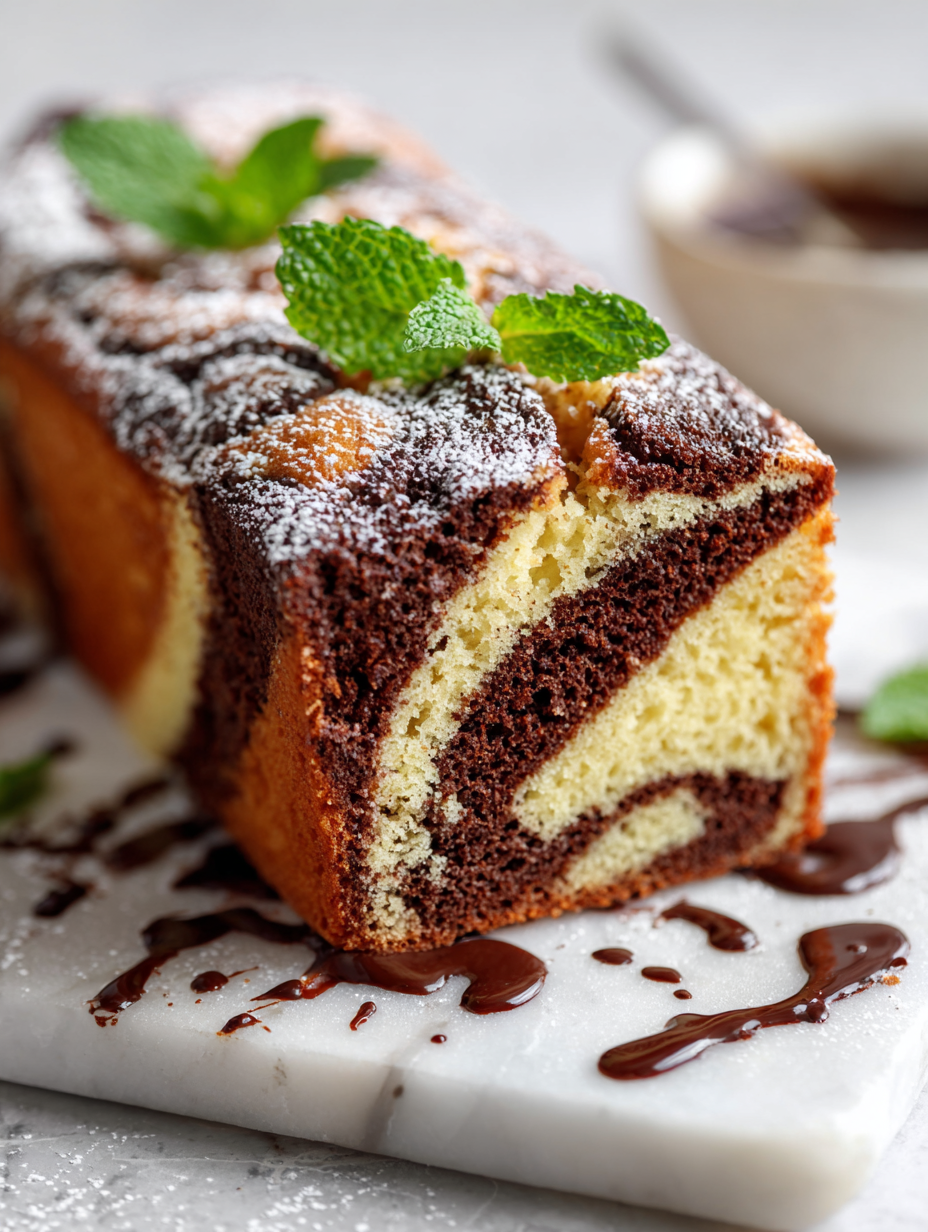
Focusing on the visual and textural contrast of the marble pattern, this recipe turns a simple pound cake into a miniature art piece, almost too pretty to cut but too tempting to leave uncut.
A Visual Treat in Every Slice
- Baking this cake reminds me of lazy Sunday mornings spent with my grandma, the kitchen filled with warm vanilla and cocoa scents.
- There’s a rush of pride every time I see that perfect marble swirl emerge from the batter—like a tiny piece of edible art.
- This recipe has become my comfort—something I turn to when I need a quiet moment of creation and a sweet reward.
- I love how the contrast in flavors and textures makes each bite feel special, almost like a mini celebration in my mouth.
The story behind this recipe
- Baking this marble pound cake always takes me back to my childhood afternoons helping my mother in the kitchen. Watching her swirl the chocolate batter into the vanilla was like watching magic happen, and I wanted to recreate that sense of wonder. It’s a simple recipe, but the visual impact makes it feel special, almost like a small piece of art you can eat.
- The idea for this cake came from a craving for contrast—something visually striking but also comfortingly familiar. I love how the dark cocoa streaks interlace with the buttery vanilla base, creating a swirl that’s both chaotic and controlled. Every time I bake it, I feel a little proud of turning basic ingredients into something that’s as pretty as it is delicious.
- heading: The charm of swirled contrasts
Trivia and Historical Notes
- This marble pound cake design originated in European bakeries in the early 20th century, showcasing both skill and artistry in baking.
- The contrast of dark cocoa and vanilla batter was initially a way to utilize leftover batter creatively, turning simple baking into decorative art.
- In some regions, marble cakes symbolize harmony and balance, as the swirling pattern represents unity of different elements.
- Historically, marble pound cakes were a festive treat during holiday seasons, often made to impress guests with their visual appeal.
Key Ingredients and Tips
- Unsalted butter: I use high-quality, European-style butter for a richer, creamier flavor that melts smoothly into the batter. Swap with vegan butter if needed, but expect a slightly different mouthfeel.
- Granulated sugar: The sugar should be fine and white; I find it dissolves best when creamed thoroughly with butter. Substitute with coconut sugar for a caramel note, but keep in mind it darkens the batter.
- Eggs: Fresh, large eggs are best—bring them to room temperature so they incorporate easily and give the cake a tender crumb. You could try flax eggs as a vegan alternative, but the texture might be slightly denser.
- All-purpose flour: I prefer unbleached flour for a more natural flavor. If gluten-free is needed, swap with a 1:1 blend, but watch for a denser crumb and slightly different rise.
- Cocoa powder: Use Dutch-processed for a smooth, less acidic taste and richer color. For a more intense chocolate flavor, add a touch of dark chocolate chips into the cocoa batter before swirling.
- Vanilla extract: I love a good pure vanilla for warmth and depth. You can substitute with vanilla bean paste for extra flecks and aroma, but avoid artificial vanilla—it’s less vibrant.
- Milk (if needed): I keep it simple with whole milk for moisture and richness. Almond or oat milk can work as well, but they’ll subtly alter the flavor and texture—go easy on the liquid to keep the batter thick enough to swirl.
Spotlight on Key Ingredients
Cocoa Powder:
- Butter: I use European-style butter for a rich, creamy texture that melts into the batter. Swap with vegan butter for a dairy-free version, but you might notice a slightly different richness.
- Dutch-processed cocoa gives a smooth, deep chocolate flavor with a velvety finish. For a more intense chocolate hit, try adding dark chocolate chips into the swirl.
Butter:
- Vanilla extract: I prefer pure vanilla for its warm aroma and depth. Vanilla bean paste adds flecks and a richer scent, but artificial vanilla just won’t cut it here—the real stuff makes a difference.
- Eggs: Fresh, large eggs at room temperature help create a tender crumb and stable batter. If you’re vegan, flax eggs work, but the texture might be slightly denser.
Notes for ingredient swaps
- Dairy-Free: Swap butter for coconut oil or vegan butter; expect a slightly lighter texture and a hint of coconut flavor.
- Sugar Alternatives: Use honey or maple syrup instead of granulated sugar; be mindful of moisture and adjust baking time slightly.
- Eggs: Replace eggs with flax eggs (1 tablespoon flaxseed meal + 3 tablespoons water per egg); the cake may be a bit denser but still moist.
- Flour: Use a gluten-free blend instead of all-purpose; texture might be a touch more crumbly, but still tasty.
- Cocoa Powder: Opt for dark chocolate or cacao nibs for a richer, more intense chocolate swirl; adjust sweetness if using sweetened options.
- Vanilla: Vanilla bean paste offers extra depth and flecks; vanilla extract works fine but lacks the visual appeal.
- Milk: Almond or oat milk can be used in place of whole milk; expect a slightly different flavor profile but still moist and tender.
Equipment & Tools
- 9×5 inch loaf pan: Shape and contain the batter during baking.
- Electric mixer or whisk: Cream butter and sugar thoroughly for a light texture.
- Rubber spatula: Scrape down bowls and fold in ingredients gently.
- Sifter: Ensure dry ingredients are lump-free and aerated.
- Toothpick or skewer: Create marbled swirl pattern and check doneness.
- Cooling rack: Help the cake cool evenly and prevent sogginess.
Step-by-step guide to marble pound cake
- Preheat your oven to 175°C (350°F). Grease a 9×5 inch loaf pan and line with parchment paper for easy release.
- In a large bowl, cream together 1 cup (225g) unsalted butter and 1 1/2 cups (300g) granulated sugar until light and fluffy, about 3-4 minutes. Smell that sweet richness?
- Add 3 large eggs, one at a time, beating well after each. Ensure eggs are at room temperature to avoid curdling. Scrape down sides as needed.
- Mix in 2 teaspoons vanilla extract; the aroma should deepen as it combines. Sift 2 1/2 cups (310g) all-purpose flour and 1 teaspoon baking powder, then gradually add to the butter mixture. Mix until just combined—don’t overbeat.
- Divide the batter evenly into two bowls. In one, fold in 1/4 cup (25g) unsweetened Dutch-processed cocoa powder. It should become dark and oozing with a chocolaty smell.
- To create the marble effect, dollop spoonfuls of vanilla and chocolate batters alternately into the prepared loaf pan. Use a skewer or toothpick to swirl gently, creating a marbled pattern.
- Bake for 55-60 minutes. Check the top for a deep golden hue and a cracked surface—edges should pull slightly away from the pan. The cake should feel firm but slightly springy when pressed.
- Insert a toothpick into the center; it should come out with moist crumbs, not wet batter. If the top darkens too quickly, tent with foil and continue baking.
- Remove from oven and let cool in the pan for 15 minutes. Then, transfer to a wire rack and cool completely before slicing for clean, sharp edges.
Allow the cake to cool completely on a wire rack before slicing. Resting for at least 30 minutes helps set the crumb and makes clean slices. Slice with a serrated knife for best results, revealing the marbled pattern in each piece.
How to Know It’s Done
- Toothpick test: inserted into center, should come out moist but not wet.
- Surface appearance: deep golden, cracked top with a slight shimmer of glaze or butter sheen.
- Touch test: firm but springy—avoids a doughy or dense feel.
Marbled Pound Cake
Ingredients
Equipment
Method
- Preheat your oven to 175°C (350°F). Grease your loaf pan and line it with parchment paper for easy removal.
- Using an electric mixer, cream together the butter and sugar until the mixture is light, fluffy, and creamy—about 3-4 minutes. You’ll notice it becomes pale and slightly increased in volume.
- Add eggs one at a time, beating well after each addition to incorporate fully. The batter should become smooth and slightly thicker, with a gentle sheen.
- Mix in the vanilla extract until fragrant—that warm aroma will fill your kitchen.
- Sift together the flour and baking powder, then add to the creamed mixture in three parts, mixing on low speed until just combined. The batter will be thick and smooth.
- Divide the batter evenly into two bowls. To one, gently fold in the sifted cocoa powder, creating a dark, chocolatey batter.
- Alternate spoonfuls of vanilla and chocolate batters into the prepared loaf pan, starting with a scoop of vanilla then chocolate, and so on. Aim for evenly spaced dollops for a striking swirl.
- Use a toothpick or skewer to gently swirl through the batters in a figure-eight motion. Don’t overmix—this creates the beautiful marbled pattern.
- Bake in the oven for 55-60 minutes, until the top is golden and a toothpick inserted in the center comes out with moist crumbs. Cover loosely with foil if the top browns too quickly.
- Allow the cake to cool in the pan for 15 minutes, then transfer to a wire rack and cool completely before slicing. This helps set the crumb and keeps the pattern sharp.
- Slice with a serrated knife to reveal the elegant marbled pattern, and enjoy this rich, tender cake with a cup of tea or coffee.
Notes
Tips & Tricks for Marble Pound Cake
- Swirl with care: Use a skewer or toothpick to create gentle, figure-eight motions for a striking marble pattern.
- Room temp ingredients: Ensure butter and eggs are at room temperature—this helps achieve a smooth, even batter that swirls effortlessly.
- Pre-sift cocoa: Sift the cocoa powder to break up lumps and evenly distribute it into the batter, avoiding clumps and streaks.
- Gentle folding: When combining batters, fold carefully to preserve airiness—stir too vigorously and the cake loses its tender crumb.
- Bake with steam: Place a pan of hot water in the oven’s lower rack during baking for a moist, tender crumb and shiny crust.
- Check early: Start testing for doneness at 55 minutes; the cake should be golden, slightly springy, and a skewer comes out clean.
- Cool completely: Let the cake cool fully before slicing—this prevents crumbling and reveals the sharp, contrasting swirl.
Common marble cake mistakes
- FORGOT to fully cool the cake before slicing → causes crumbling; cool in pan 15 min, then wire rack.
- DUMPED in too much cocoa powder → makes batter thick and dry; add a splash of milk to loosen.
- OVER-TORCHED the edges → cake darkens unevenly; tent with foil after 40 mins if top browns too fast.
- MISSED to swirl gently → results in a muddled marble pattern; use a skewer with light, swirling motions.
Quick Fixes for Marble Cake
- When batter is too thick, splash in a little milk and stir gently.
- If swirl pattern is muddled, patch with a skewer and a gentle twist.
- Splash a pinch of salt into cocoa to brighten the chocolate flavor.
- Dumped in too much cocoa? Add a touch more butter or sugar to balance.
- When cake cracks unevenly, shield with foil and lower oven temp slightly.
Prep, store, and reheat tips
- Wrap cooled cake tightly in plastic wrap to keep it moist and prevent staling. It keeps well for up to 3 days at room temperature.
- For longer storage, place the wrapped cake in an airtight container or zip-top bag and refrigerate for up to a week. The flavors may meld and deepen slightly.
- Freeze slices or the whole cake for up to 3 months. Wrap in plastic, then foil, and thaw at room temperature for about an hour before serving.
- Reheat chilled or frozen slices briefly in a 150°C (300°F) oven for 10-15 minutes until warm and fragrant. You’ll notice the aroma intensify and the crumb soften again.
- To serve at its best, bring the cake to room temperature before cutting. It’ll be softer, with the marbled pattern more defined and the flavors more vibrant.
Top questions about marble pound cake
1. Can I make this cake dairy-free?
You can swap the butter for margarine or a neutral oil like vegetable oil, but expect a slightly different texture and richness.
2. Can I use different cocoa powders?
Yes, using a different type of cocoa powder, like dark or special dark, will give you a richer chocolate flavor, but the color might vary.
3. How do I get clean slices?
Allow the cake to cool completely on a wire rack before slicing to prevent crumbling. Use a serrated knife for clean cuts.
4. How do I avoid a dense cake?
Overmixing the batter can make the cake dense. Mix just until ingredients are combined, especially after adding flour.
5. My marble pattern isn’t visible, what do I do?
If the swirl pattern isn’t visible, gently lift the batter with a skewer for a more defined marble effect before baking.
6. How should I store leftover cake?
Store the cooled cake wrapped tightly at room temperature for up to 2 days, or refrigerate for up to a week to prolong freshness.
7. Can I reheat the cake?
To reheat, warm slices in a low oven (around 150°C/300°F) for about 10 minutes until fragrant and soft again.
8. Should eggs be cold or at room temperature?
Using fresh, room-temperature eggs helps create a lighter, more tender crumb and better swirl integration.
9. Can I enhance the chocolate flavor?
Try adding a teaspoon of espresso powder or a splash of coffee to intensify the chocolate flavor without overpowering the sweetness.
10. How do I ensure even baking?
Ensure your oven is properly calibrated—an oven thermometer can help—so the cake bakes evenly and the crust develops just right.
Baking this marble pound cake is like capturing a little bit of art and comfort in one slice. Each time I make it, I’m reminded of the simple joy in turning basic ingredients into something both beautiful and satisfying.
It’s perfect for moments when you want a dessert that looks impressive but doesn’t require fuss. Honestly, the best part is that every slice reveals that striking swirl, a little surprise in every bite.