
Peanut butter in muffins might sound a bit unconventional, but it’s a trick I’ve loved for years. It adds this incredible depth of nutty richness that transforms a simple breakfast into something a little more special. Plus, the creamy texture melts into the batter, making each bite feel cozy and familiar, even if you’re rushing out the door.
Growing up, peanut butter was always a quick fix—spread on bread, dolloped in a smoothie, or straight from the jar. When I started baking my own muffins, I realized peanut butter could do double duty: flavor and moisture. Now, these muffins are my go-to for busy mornings or when I want a nostalgic treat that’s genuinely practical.
Using peanut butter in muffins as a way to add both richness and a nutty flavor, inspired by childhood snack memories but adapted for a quick breakfast treat that’s a little unexpected.
Nostalgic comfort with a twist
- Making these muffins always takes me back to Sunday mornings at my grandma’s house, where the smell of peanut butter and warm bread filled the air.
- There’s a quiet pride I get when I see how quickly these disappear from the plate — like a little secret I’ve been hiding.
- I love the chaos of mixing everything in one bowl, no fuss, no fancy tools — just honest, straightforward baking that feels like a hug.
- Every time I bake these, I remember how simple ingredients can create something unexpectedly comforting and satisfying.
- Sharing these muffins with friends feels like passing along a small piece of nostalgia that never really fades.
The story behind this recipe
- This recipe was born out of a lazy Sunday morning I spent digging through my pantry, looking for something quick but satisfying. I remembered how my childhood mornings often started with peanut butter spread thick on toast, and I wondered how that rich, nutty flavor could be baked into a muffin. The result was a happy accident — a muffin that’s hearty and slightly sticky in the best way, with a flavor that’s familiar but elevated.
- I’ve always loved how peanut butter can turn a simple baked good into something special without much fuss. These muffins became my go-to when I needed a breakfast that felt indulgent but was actually pretty straightforward. They’re perfect for mornings when you crave a little comfort but don’t want to spend hours in the kitchen.
- heading
- story_type
Trivia and Origins
- Peanut butter muffins likely originated from home baking traditions where resourcefulness turned pantry staples into treats.
- In the 1950s, peanut butter’s popularity surged, inspiring creative recipes like these muffins for quick, hearty breakfasts.
- This recipe is a modern twist on classic nut-butter baked goods, blending nostalgic flavors with a practical, everyday treat.
Ingredient breakdown: key components
- Creamy peanut butter: I prefer a smooth, natural variety that melts beautifully into the batter, giving a rich, nutty aroma. Swap with almond butter if you want a different nutty twist, but expect a slightly different flavor profile.
- All-purpose flour: I use regular flour for structure, but whole wheat can add depth and a bit more chew. Keep in mind, whole wheat might make the muffins denser and darker.
- Brown sugar: I love the molasses note it adds, complementing the peanut butter’s richness. You can substitute with coconut sugar for a slightly caramelized flavor, though it might affect moisture.
- Baking powder: This is my secret to keeping the muffins light and fluffy. If you forget it, the muffins will be dense—consider adding a touch more baking soda if you need to compensate.
- Eggs: They help bind everything together and give a tender crumb. For a vegan version, flax eggs work, but the texture will be a tad denser and more crumbly.
- Milk: I use whole milk for richness, but almond or oat milk work well too. The milk’s creaminess helps keep the muffins moist and tender, especially if using a dairy-free milk.
- Vanilla extract: Just a splash brightens the whole thing, adding depth. Skip if you want a more straightforward, nutty flavor—though I wouldn’t recommend it.
Spotlight on key ingredients
Peanut Butter:
- Creamy peanut butter: I prefer a smooth, natural variety that melts beautifully into the batter, giving a rich, nutty aroma. Swap with almond butter if you want a different nutty twist, but expect a slightly different flavor profile.
- All-purpose flour: I use regular flour for structure, but whole wheat can add depth and a bit more chew. Keep in mind, whole wheat might make the muffins denser and darker.
- Brown sugar: I love the molasses note it adds, complementing the peanut butter’s richness. You can substitute with coconut sugar for a slightly caramelized flavor, though it might affect moisture.
All-purpose Flour and Eggs:
- Baking powder: This is my secret to keeping the muffins light and fluffy. If you forget it, the muffins will be dense—consider adding a touch more baking soda if you need to compensate.
- Eggs: They help bind everything together and give a tender crumb. For a vegan version, flax eggs work, but the texture will be a tad denser and more crumbly.
- Milk: I use whole milk for richness, but almond or oat milk work well too. The milk’s creaminess helps keep the muffins moist and tender, especially if using a dairy-free milk.
Notes for ingredient swaps
- Dairy-Free: Swap regular milk for almond or oat milk. It keeps the muffins moist, but the flavor becomes a little nuttier and less creamy.
- Nut Butter: Use almond or cashew butter instead of peanut. It changes the flavor but still adds richness and moisture.
- Sweetener: Replace brown sugar with coconut sugar for a caramel note, though it might make the muffins slightly darker and less moist.
- Flour: Whole wheat flour can replace all-purpose for a nuttier, denser muffin, with a bit more chew and darker hue.
- Eggs: Flaxseed eggs work for vegan needs, but expect a denser crumb and slightly different texture.
- Add-ins: Chocolate chips or dried fruit can be mixed in for extra flavor, but they’ll affect the overall texture and sweetness.
- Baking Powder: If you don’t have it, a mixture of baking soda and cream of tartar can work, but the rise might be slightly different.
Equipment & Tools
- Muffin tin: Holds the batter and shapes the muffins.
- Mixing bowls: Combine ingredients separately and together.
- Whisk or spoon: Mix ingredients smoothly and gently fold.
- Measuring cups and spoons: Ensure accurate ingredient portions.
- Oven: Bake the muffins evenly at controlled temperature.
- Wire rack: Cool muffins to prevent sogginess.
Step-by-step guide to peanut butter muffins
- Preheat your oven to 180°C (350°F). Grease a muffin tin or line with paper liners. Set aside.
- In a large bowl, stir together 1 cup all-purpose flour, 1/2 cup brown sugar, 1 teaspoon baking powder, and a pinch of salt. Whisk to combine.
- In a separate bowl, mix 1/2 cup creamy peanut butter, 2 large eggs, 1/2 cup milk, and 1 teaspoon vanilla extract until smooth. If the peanut butter is thick, warm it slightly to loosen.
- Pour the wet ingredients into the dry and gently fold until just combined. Do not overmix; the batter should be slightly lumpy.
- Divide the batter evenly among the muffin cups, filling each about 3/4 full. Use a spoon or an ice cream scoop for neatness.
- Bake in the preheated oven for 15-20 minutes. The muffins are done when they turn golden around the edges and a toothpick inserted in the center comes out clean.
- While baking, smell the warm peanut aroma fill your kitchen — it’s the best part. If the tops crack or puff unevenly, don’t worry, they’ll still be moist inside.
- Remove from the oven and let the muffins rest for 5 minutes in the tin. Then transfer to a wire rack to cool slightly before serving.
- For finishing, you can drizzle a little honey or sprinkle sea salt on top if desired. Serve warm or at room temperature, ideally with a glass of cold milk.
- Check for doneness: a) Muffins are golden and slightly cracked on top. b) Toothpick inserted in center comes out clean. c) Muffins feel firm but tender when gently pressed.
Let the muffins rest in the tin for 5 minutes, then transfer to a wire rack. Serve warm or at room temperature, topped with a drizzle of honey or a sprinkle of sea salt if you like. These are best enjoyed fresh but keep in an airtight container for up to 2 days, reheat briefly if desired.
How to Know It’s Done
- Golden edges and cracked tops indicate doneness.
- Toothpick test: clean when inserted in center.
- Muffins should feel firm yet soft when touched.
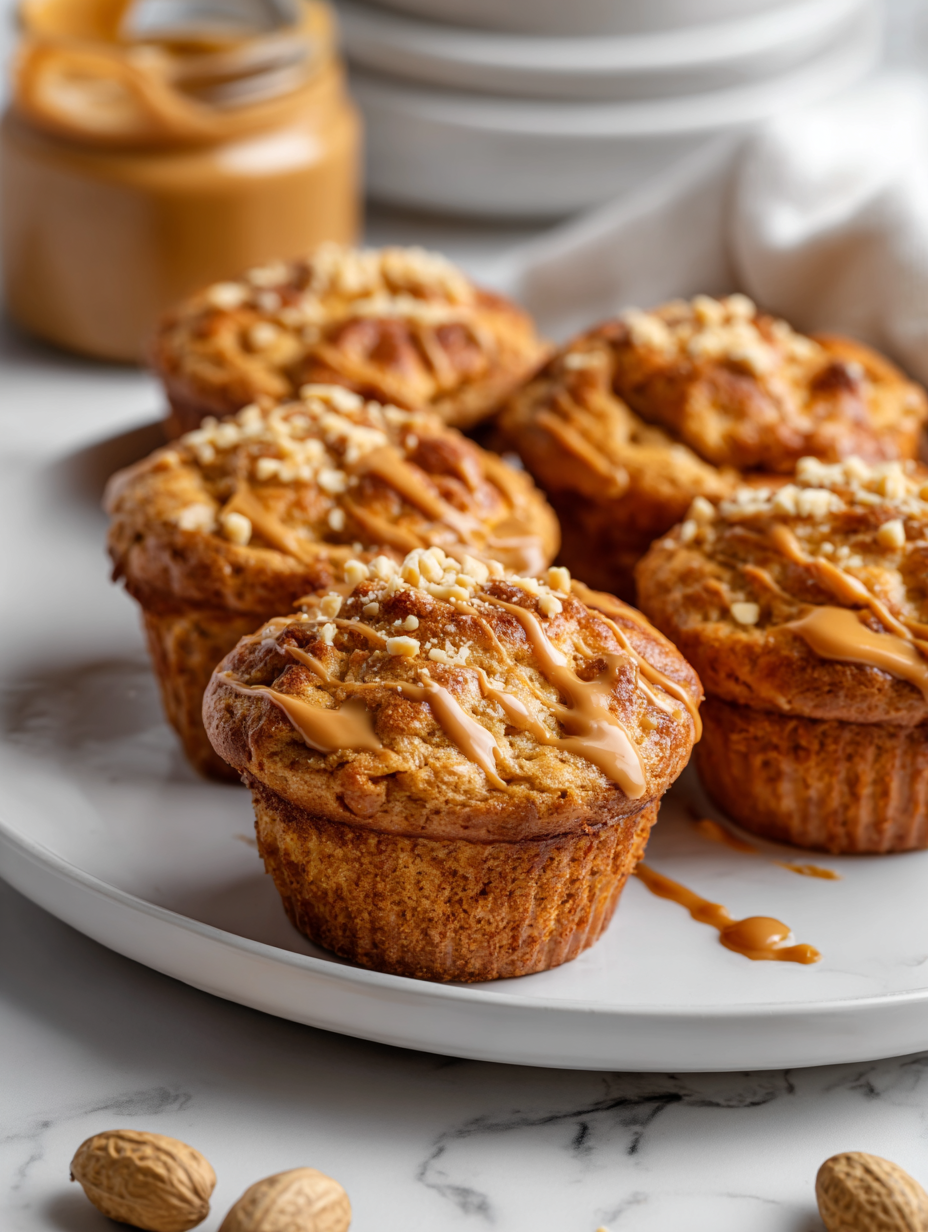
Peanut Butter Muffins
Ingredients
Equipment
Method
- Preheat your oven to 180°C (350°F) and line a muffin tin with paper liners or lightly grease it. Gather your ingredients and measure out the flour, sugar, baking powder, and salt into a large bowl. Whisk them together until evenly combined.
- In a separate bowl, combine the creamy peanut butter, eggs, milk, and vanilla extract. Whisk until the mixture is smooth, creamy, and slightly frothy — this helps the peanut butter melt into the batter evenly.
- Pour the wet mixture into the bowl with the dry ingredients. Gently fold everything together with a spatula or spoon until just combined. Be careful not to overmix; the batter should be a bit lumpy and thick but well incorporated.
- Divide the batter evenly among the muffin cups, filling each about three-quarters full. Use a spoon or an ice cream scoop for neat, consistent portions. The batter should mound slightly over the top of each cup.
- Bake the muffins in the preheated oven for 15-20 minutes. You'll notice the tops turning a warm, golden brown and possibly cracking slightly. Insert a toothpick into the center of a muffin; if it comes out clean, they're ready.
- Remove the muffins from the oven and let them rest in the tin for about 5 minutes. Then, transfer them to a wire rack to cool slightly. The smell of toasted peanut butter and baked batter will fill your kitchen — it’s irresistible!
- Serve the muffins warm or at room temperature. For an extra touch, drizzle with honey or sprinkle a pinch of sea salt on top before serving. Enjoy their moist, tender crumb with a rich peanut aroma in every bite!
Pro tips for perfect muffins
- Use room temperature eggs to incorporate more smoothly into the batter, avoiding lumps.
- Slightly under-mix the batter to keep muffins tender and prevent toughness.
- Add a handful of chocolate chips or chopped nuts for texture and surprise bites.
- For a shiny top, brush the muffins with a little milk or egg wash before baking.
- Don’t open the oven door too early — wait until the edges are golden and the tops crack slightly.
- If muffins brown unevenly, rotate the pan halfway through baking for even color.
- Let the muffins rest for at least 5 minutes in the tin before transferring to cool — they finish setting up perfectly.
Common mistakes and how to fix them
- FORGOT to preheat oven → Always preheat to ensure even baking.
- DUMPED batter too quickly → Fold gently to keep muffins fluffy and tender.
- OVER-TORCHED tops → Cover with foil if browning too fast, check at 15 mins.
- UNDER-mixed ingredients → Mix just until combined; overmixing makes muffins dense.
Quick fixes and pantry swaps
- When batter is too thick, splash in a teaspoon of milk and gently fold.
- If muffins turn out flat, open the oven slightly and increase baking time by 2 minutes.
- Splash a few drops of vanilla on the muffins’ tops before baking for extra aroma.
- Patch cracked tops with a tiny dollop of peanut butter for a richer look and flavor.
- Shield muffins with foil if tops brown too quickly, preventing over-torched edges.
Prep, store, and reheat tips
- Prepare the dry ingredients the night before to save time in the morning; just mix and store in an airtight container.
- The batter can be made up to 24 hours ahead; keep it covered in the fridge, and give it a gentle stir before baking.
- Store baked muffins in an airtight container at room temperature for up to 2 days; for longer storage, refrigerate for 4-5 days.
- To freeze, wrap muffins individually in plastic wrap, then place in a freezer bag; they keep well for up to 3 months.
- Reheat muffins in the microwave at 50% power for 15-20 seconds until warm; they develop a soft, inviting aroma and moist texture.
Top questions about peanut butter muffins
1. Can I use chunky peanut butter?
Use creamy peanut butter for a smooth, rich texture and aroma. You can try almond butter for a different nut flavor, but the taste and moisture will differ slightly.
2. How do I know when the muffins are done?
Yes, but expect some added crunch and texture. It might also slightly alter the batter’s consistency, so blend or chop the chunks finely.
3. Can I make these gluten-free?
Look for a golden top with cracks, a firm but springy feel when gently pressed, and a toothpick inserted in the center coming out clean.
4. Can I add chocolate chips?
Yes, replace all-purpose flour with a gluten-free blend. The texture may be slightly denser, so adjust baking time if needed.
5. How should I store leftovers?
Absolutely. Mix a handful of chocolate chips into the batter before baking for a melty surprise in each bite.
6. Can I freeze the batter?
Keep muffins in an airtight container at room temperature for up to 2 days, or refrigerate for up to 5 days. Freeze for longer storage.
7. What’s a good vegan substitute?
Yes, prepare the batter ahead, cover tightly, and freeze for up to 24 hours. Thaw in the fridge overnight before baking.
8. How do I fix muffins that are too dense?
Use flax eggs or chia eggs in place of regular eggs, and plant-based milk like almond or oat milk for moisture.
9. Any tips for extra flavor?
Gently fold the batter less, ensure baking powder is fresh, and avoid overmixing to keep muffins light and fluffy.
10. Can I bake these in a loaf pan?
Add a teaspoon of vanilla or a pinch of cinnamon to enhance the nutty aroma and deepen the flavor.
Baking these peanut butter muffins brings back memories of simple mornings filled with the comforting smell of roasted nuts and warm batter. They’re a little messy, a little nostalgic, and always satisfying in a way that’s hard to describe. In times when I need a quick, flavorful treat, they remind me that good things often come together with just a few honest ingredients.
Sharing them with friends or family feels like passing around a small piece of that warmth. They’re perfect for those busy mornings or lazy afternoons when you want something homemade and genuinely comforting—no fuss, just good, honest baking.