
This strawberry yogurt loaf is a quiet celebration of summer’s fleeting sweetness. I love how the ripe strawberries burst with juice, their brightness balanced by the tangy creaminess of yogurt, all baked into a tender, moist loaf. It’s the kind of treat that feels like a little slice of sunshine on a lazy afternoon.
Honestly, I started making this recipe when I needed a comforting bake that didn’t demand too much fuss but still delivered on flavor. The process is straightforward, but the results feel special enough to serve to friends or keep as a cozy weekend indulgence. It’s a way to hold onto the last of the season’s berries, even as they start to fade.
This recipe is inspired by the idea of turning a simple breakfast treat into a nostalgic afternoon snack, capturing the fleeting flavor of ripe strawberries and creamy yogurt in a moist loaf that feels like a hug from summer.
A Nostalgic Summer Treat
- Making this loaf always brings a rush of childhood memories, sticky fingers and all.
- I love how the strawberries turn jammy and oozy during baking, adding a surprise burst of flavor.
- There’s a quiet pride in turning simple ingredients into something that feels indulgent and special.
- Baking this when I’m craving comfort, it’s like a warm hug in every slice.
- Sharing this loaf with friends feels like passing along a little piece of summer’s fleeting joy.
A Nostalgic Summer Treat
This recipe came about during a summer visit to my parents’ farm, where I watched ripe strawberries spilling over their baskets. I realized how the simple act of combining fresh fruit with creamy yogurt could transform into something cozy and satisfying, perfect for those lazy mornings or afternoon snacks. It’s a reminder that good flavors can come from humble ingredients, and sometimes, the best recipes are born from improvisation and a little bit of nostalgia.
Contextual origin, trivia, or history
- This strawberry yogurt loaf draws inspiration from European quick-bread traditions, where fruit and dairy often meet in simple, wholesome baked goods.
- Historically, yogurt’s use in baking became popular in Eastern Europe and the Middle East, adding moisture and a subtle tang to cakes and breads.
- Strawberries, once considered a symbol of prosperity and love, have been cultivated in Europe since the Roman Empire, making their way into many traditional desserts.
- The combination of fruit, dairy, and flour in this loaf reflects a culinary trend of transforming everyday ingredients into comforting, portable treats.
Ingredient breakdown: key components
- Strawberries: I love how ripe strawberries turn jammy and oozy when baked, releasing a sweet aroma that fills the kitchen. For a deeper flavor, opt for slightly soft, fragrant berries; skip the underripe ones.
- Greek yogurt: It adds moisture and a subtle tang, making the loaf incredibly tender. Use full-fat for richness; if you want a lighter version, swap with plant-based yogurt but expect a slightly less creamy crumb.
- All-purpose flour: I prefer unbleached flour for a more natural flavor, but you can substitute with whole wheat for extra nuttiness—just expect a denser texture and a darker crumb.
- Sugar: I usually use regular granulated sugar, but honey or maple syrup can work in a pinch—just reduce the liquid slightly. The sugar balances the tartness of the strawberries beautifully.
- Eggs: They help bind everything together and give structure. For a fluffier loaf, make sure they’re at room temperature; skip if you’re egg-free, but the rise might be a little less.
- Baking powder: It’s the leavening hero here, giving the loaf lift. Make sure it’s fresh—older baking powder can flatten your bake. If you prefer a more dense bread, cut back slightly.
- Vanilla extract: I add a splash for warmth and depth, but a bit of lemon zest can brighten the flavor even more—use sparingly to avoid overpowering the berries.
Spotlight on Key Ingredients
Strawberries:
- I love how ripe strawberries turn jammy and oozy when baked, releasing a sweet aroma that fills the kitchen. For a deeper flavor, opt for slightly soft, fragrant berries; skip the underripe ones.
- Greek yogurt: It adds moisture and a subtle tang, making the loaf incredibly tender. Use full-fat for richness; if you want a lighter version, swap with plant-based yogurt but expect a slightly less creamy crumb.
Greek yogurt:
- It lends a moist, tender crumb with a tangy note that balances the sweetness. Use full-fat for richness, or try plant-based options for a different flavor profile but expect a less creamy texture.
- Strawberries: Their juicy burst during baking creates pockets of sweetness and vibrant color. Choose ripe, fragrant berries for the best flavor, and gently fold them into the batter to avoid bleeding.
Notes for ingredient swaps
- Dairy-Free: Swap Greek yogurt for coconut or almond yogurt. Expect a slightly thinner crumb and a hint of tropical flavor.
- Sugar Alternatives: Use honey, maple syrup, or agave nectar instead of granulated sugar. Reduce liquid by a tablespoon for each cup used.
- Flour Options: Substitute whole wheat or spelt flour for all-purpose. The loaf will be denser with a nuttier flavor.
- Fruit Variations: Raspberries or blueberries can replace strawberries. They may bleed more during baking, so handle gently.
- Egg-Free: Replace eggs with applesauce (1/4 cup per egg) or a flaxseed meal mix. The texture might be slightly less airy.
- Yogurt: Use sour cream or buttermilk in a pinch for moisture. Expect a tangier, less creamy result.
- Add-Ins: Incorporate chopped nuts or a drizzle of honey on top before baking for extra texture and flavor.
Equipment & Tools
- Loaf pan: Holds the batter during baking and shapes the loaf.
- Mixing bowls: Combine wet and dry ingredients separately.
- Whisk and spatula: Mix ingredients thoroughly and fold in strawberries gently.
- Measuring cups and spoons: Ensure accurate ingredient proportions.
- Toothpick or cake tester: Check for doneness.
- Wire rack: Cool the loaf evenly and prevent sogginess.
Step-by-step guide to baking
- Preheat your oven to 180°C (350°F). Grease a 9×5 inch loaf pan with butter and lightly dust with flour or line with parchment paper. Have all ingredients measured and ready to go.
- In a large bowl, whisk together 1 1/2 cups all-purpose flour, 1 teaspoon baking powder, and a pinch of salt. Set aside.
- In another bowl, mash 1 cup of fresh strawberries with a fork until chunky but somewhat smooth. Mix in 1/2 cup Greek yogurt, 1/2 cup granulated sugar, 2 beaten eggs, and 1 teaspoon vanilla extract until combined.
- Pour the wet ingredients into the dry ingredients. Gently fold until just combined, being careful not to overmix. The batter will be thick and slightly lumpy.
- Add 1 cup of chopped strawberries to the batter, folding gently to distribute evenly. If the batter seems too thick, stir in a tablespoon of milk or lemon juice.
- Transfer the batter to the prepared loaf pan, smoothing the top with a spatula. Place in the oven and bake for 50-60 minutes, or until the top is golden and a toothpick inserted into the center comes out clean.
- During baking, the loaf will rise and turn a rich golden color. The strawberries will ooze slightly, filling the kitchen with a sweet, fruity aroma.
- Check for doneness: the top should be crackly and firm, the edges slightly pulling away from the pan, and the toothpick should come out clean. If over-browning, loosely tent with foil.
- Remove from oven and let cool in the pan for 15 minutes. Then, transfer to a wire rack and allow to cool completely before slicing. Resting helps set the crumb and prevents crumbling.
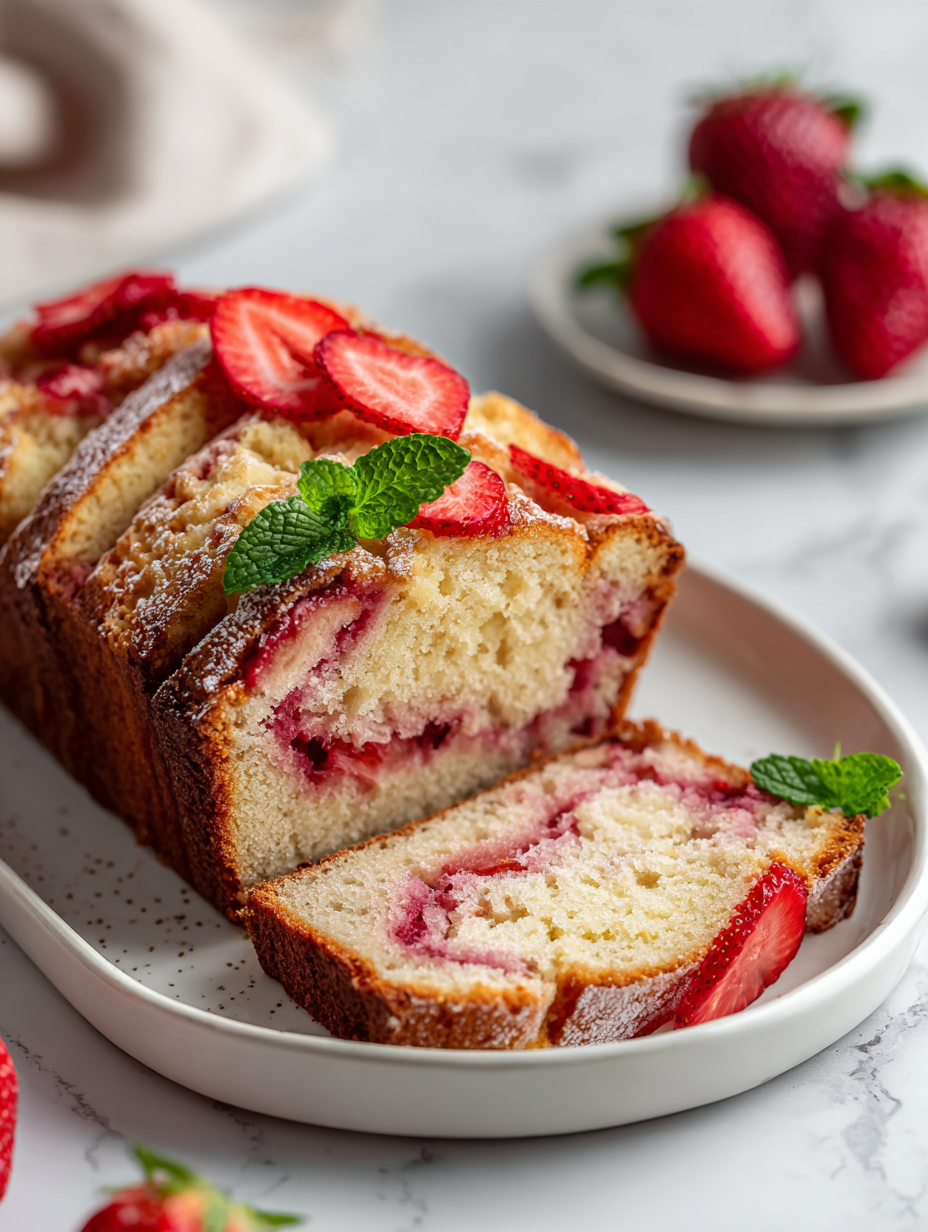
- Slice with a serrated knife, revealing the moist, speckled interior. Serve plain or with a dollop of extra yogurt or fresh strawberries on top.
Allow the loaf to cool in the pan for 15 minutes, then transfer to a wire rack. Let it cool completely before slicing to avoid crumbling. Serve slices with extra strawberries or a smear of yogurt for added creaminess.
How to Know It’s Done
- Loaf is golden and firm on top, with a slight crackle.
- Toothpick inserted in the center comes out clean.
- Strawberry juices are bubbling around the edges, indicating doneness.
Strawberry Yogurt Loaf
Ingredients
Equipment
Method
- Preheat your oven to 180°C (350°F). Lightly grease your loaf pan or line it with parchment paper to prevent sticking.
- In a large mixing bowl, whisk together the flour, baking powder, and salt until well combined. This ensures an even rise and distribution of leavening agents.
- In a separate bowl, mash the strawberries slightly with a fork until chunky but with some juice. This helps release their flavor and makes folding easier later.
- In another bowl, combine the Greek yogurt, sugar, eggs, and vanilla extract. Whisk until the mixture is smooth, slightly thickened, and fragrant—about 1 minute.
- Pour the wet mixture into the bowl with the dry ingredients. Gently fold everything together with a spatula until just combined—be careful not to overmix, as this can make the loaf dense.
- Gently fold in the chopped strawberries, distributing them evenly throughout the batter. Avoid overmixing to prevent bleeding juice and keep the strawberries intact.
- Transfer the batter into your prepared loaf pan, spreading it out evenly with a spatula. Lightly tap the pan on the counter to settle the batter and release any air bubbles.
- Bake in the preheated oven for about 50 to 55 minutes. The loaf is ready when it turns a deep golden color, and a toothpick inserted into the center comes out clean.
- Once baked, remove the loaf from the oven and let it cool in the pan for 15 minutes. This helps the crumb set and makes slicing easier.
- After cooling, transfer the loaf to a wire rack and let it cool completely before slicing. When ready, cut into thick slices with a serrated knife to reveal the moist, speckled interior.
- Serve slices plain or with a dollop of extra yogurt or fresh strawberries for an extra touch of summer's sweet brightness. Enjoy your homemade strawberry yogurt loaf!
Baking Tips & Tricks
- Use room temperature ingredients to ensure even mixing and better rise.
- Gently fold strawberries into the batter to prevent bleeding and preserve their shape.
- Tap the loaf pan on the counter before baking to release air bubbles and promote even baking.
- Keep an eye on the oven’s heat; an oven thermometer helps avoid over-baking or underbaking.
- Check for doneness with a toothpick; it should come out clean with a few moist crumbs.
- Let the loaf cool in the pan for at least 15 minutes to set the crumb before transferring to a wire rack.
- For a glossy top, brush with a little milk or egg wash before baking and sprinkle with sugar.
Common mistakes and how to fix them
- FORSOUGHT to check oven temperature; adjust baking time accordingly.
- DUMPED in too much liquid; fold in extra flour to thicken batter.
- OVER-TORCHED edges; tent with foil halfway through baking.
- MISSED the cooling step; let loaf rest to prevent crumbling.
Quick fixes and pantry swaps
- If strawberries release too much juice, sprinkle a little flour to absorb excess moisture.
- When batter is too thick, splash in a teaspoon of milk to loosen it up.
- Splash a quick spray of lemon juice if strawberries are bland, brightening their flavor.
- Patch a cracked loaf by gently pressing the crack closed and baking for an extra 5 minutes.
- Shield the top with foil if it browns too quickly, preventing over-torching while the inside finishes.
Prep, store, and reheat tips
- Prep the batter ingredients ahead—measure and mash strawberries the night before to save time and preserve freshness.
- Store baked loaf in an airtight container at room temperature for up to 2 days; refrigerate for up to 5 days, which intensifies the flavor and keeps it moist.
- Wrap slices tightly in plastic wrap or foil before refrigeration to prevent drying out and maintain a soft, tender crumb.
- Reheat slices briefly in the microwave—about 15-20 seconds—until just warm and fragrant, with strawberries still oozy and inviting.
- For longer storage, freeze slices wrapped in plastic, up to 1 month. Thaw at room temperature, then reheat as desired, watching for the soft, fragrant aroma.
Top questions about strawberry yogurt loaf
1. Can I use frozen strawberries?
Use ripe strawberries for a sweeter, juicier loaf. Underripe berries can make it bland. Choose fragrant, soft berries for best flavor.
2. Can I freeze the loaf?
Yes, but thaw and drain excess moisture first. Frozen berries release more juice, which can make the batter too wet.
3. How long does it keep?
Wrap tightly in plastic wrap or foil, then freeze up to a month. Thaw at room temperature before slicing.
4. Should I reheat leftovers?
Reheat slices briefly in the microwave for about 15 seconds until warm. It restores moisture and enhances aroma.
5. Can I substitute Greek yogurt?
Use full-fat Greek yogurt for a tender, moist crumb. For a lighter version, try plant-based yogurt, but expect a less creamy texture.
6. What about dairy substitutions?
Yes, you can substitute with sour cream or buttermilk, which will also add moisture but slightly alter the tang.
7. How do I know it’s baked enough?
Adjust baking time if your oven runs hot or cold. Start checking at 50 minutes; the loaf is done when golden and a toothpick comes out clean.
8. What’s the best test for doneness?
Use a toothpick inserted into the center—if it comes out clean, it’s ready. The top should be golden and crackly.
9. How do I prevent the strawberries from bleeding?
Avoid overmixing; fold in strawberries gently to prevent bleeding and maintain their shape. Overmixing can make the loaf dense.
10. How should I slice the loaf?
Use a serrated knife for neat slices. Let the loaf cool completely to avoid crumbling when slicing.
Baking this loaf feels like capturing a moment of summer’s essence, with its juicy strawberries and tender crumb. Each slice carries a whisper of nostalgia, reminding me of lazy afternoons and simple pleasures. It’s a humble treat that somehow feels just right for right now, whether as a quick breakfast or an afternoon pick-me-up.
Sharing it with friends or keeping it tucked away for later, this loaf always offers a little slice of comfort. Its moist texture and bright flavor make it more than just a dessert—it’s a reminder to savor the small, sweet moments.