
There’s something about the smell of honey oat bread that instantly transports me back to early mornings at my grandma’s kitchen. It’s that warm, slightly sweet aroma mingling with the toasty scent of oats—pure comfort in scent form. Baking it feels like a small act of kindness, a way to slow down and savor simple joys.
This bread isn’t fancy or complicated, but it carries a nostalgic weight that’s hard to beat. The chewy texture from the oats and the gentle sweetness of honey make every slice feel like a treat, even when it’s just for breakfast. It’s the kind of bread that makes your house smell like a cozy morning no matter what the day holds.
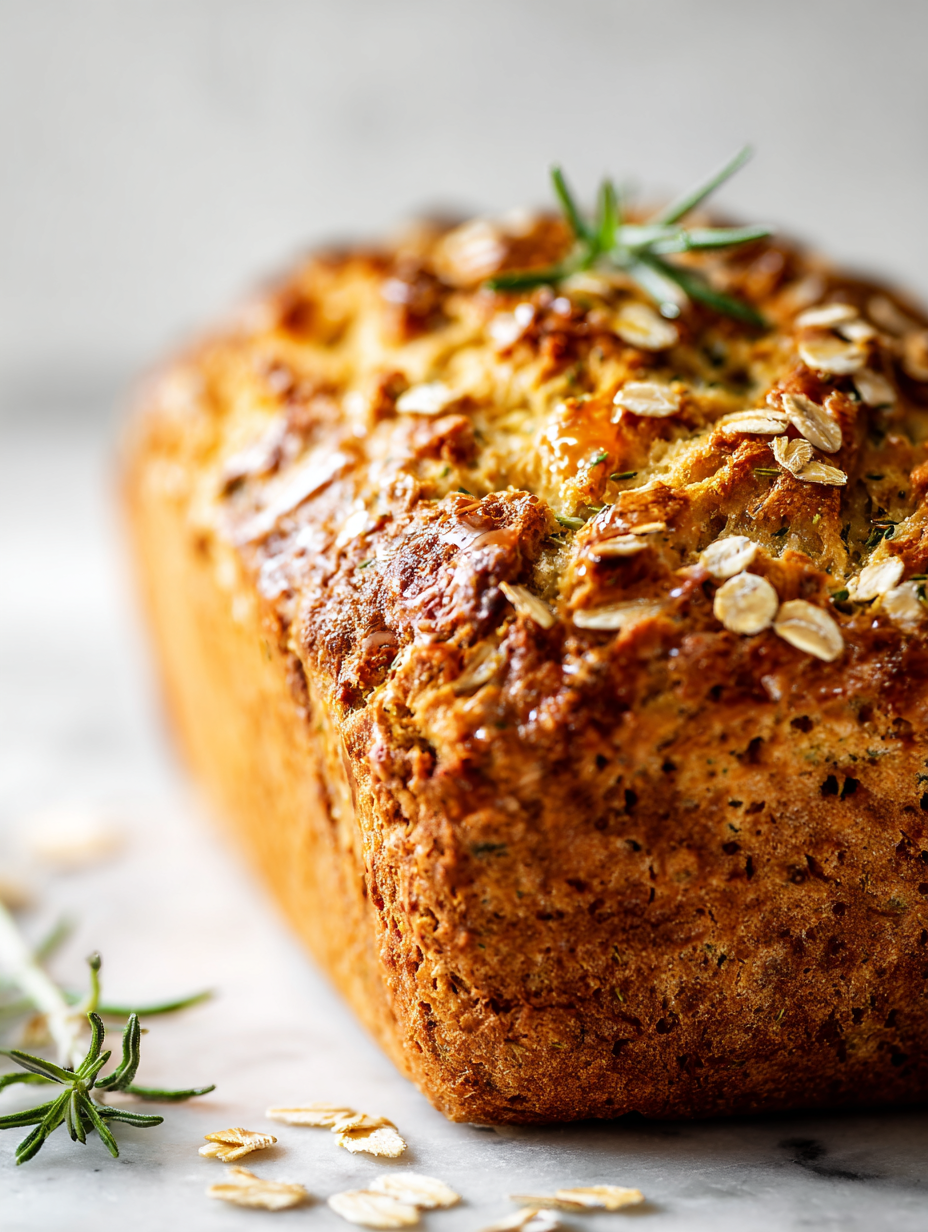
Focusing on the nostalgic charm of homemade honey oat bread, emphasizing its comforting aroma and slightly chewy texture that reminds me of early mornings and simple joys.
Nostalgia in Every Slice
- Baking this bread reminds me of lazy Sunday mornings at home, the sweet scent filling the whole house.
- There’s a quiet pride in pulling a warm loaf from the oven, knowing I made it from scratch.
- This recipe has been my comfort during hectic weeks, the simple act of kneading grounding me.
- Sharing slices of this honey oat bread feels like passing on a little piece of my cozy mornings.
- Every time I bake it, I’m reminded that good things often come from simple ingredients and patience.
The story behind this recipe
This honey oat bread recipe was born out of my quest to create something that combines the rustic charm of a homemade loaf with the wholesome goodness I craved during busy mornings. I remember experimenting with different ratios of honey and oats, trying to get that perfect balance of sweetness and chewiness. One chilly weekend, I finally nailed it, and the smell of toasted oats mingling with honey filled the kitchen—it was like capturing a cozy, fleeting moment in bread form. Since then, baking this loaf has become my little ritual for slowing down and savoring simple, honest ingredients.
Trivia and Historical Notes
- Honey oat bread has roots in rustic European baking traditions, where oats were a common grain for hearty loaves.
- The use of honey in bread dates back to ancient Egypt, where it was prized as a natural sweetener and preservative.
- Oats were historically considered a humble, nourishing grain, often associated with farm life and simplicity.
- This bread’s popularity surged during the health food movement of the 1970s, emphasizing whole grains and natural sweeteners.
Breakdown of Key Ingredients
- Honey: I use a mild, floral honey that adds a gentle sweetness and helps keep the bread moist—feel free to swap for maple syrup if you prefer a different aroma.
- Old-fashioned oats: I love the chewy texture they bring, especially when toasted until golden; skip with quick oats if you want a softer crumb, but you might lose some of that hearty bite.
- Bread flour: I rely on bread flour for structure and elasticity, but all-purpose will work if you don’t have it—just expect a slightly less chewy crust.
- Yeast: Active dry yeast is my go-to, and I always proof it in warm water first; if it doesn’t foam, your dough might not rise well—check your yeast’s freshness.
- Salt: It’s essential for flavor and controlling fermentation, but if you’re reducing sodium, cut back gradually to avoid dulling the bread’s depth of flavor.
- Water: Lukewarm tap water is fine, but I sometimes add a splash of milk for extra richness and a softer crumb—experiment to see what suits your taste.
- Optional seeds: I sprinkle sunflower or flax seeds on top before baking for a nutty crunch and visual appeal—feel free to skip if seeds aren’t your thing.
Spotlight on key ingredients
Honey:
- I love a floral, mild honey that adds a gentle sweetness and keeps the bread moist—swap for maple syrup if you want a caramel note.
- Oats: Toasted old-fashioned oats provide a hearty chew and a toasty aroma; quick oats soften the texture but lose some of that rustic bite.
Oats:
- Old-fashioned oats: They’re chewy and slightly nutty, creating a rustic crust and hearty crumb that feels substantial with each bite.
- During baking, they toast to a golden hue, and their natural oils become fragrant, adding a subtle smoky note that deepens the flavor.
Notes for ingredient swaps
- Honey: I prefer a mild, floral honey for a subtle sweetness that won’t overpower. Swap with maple syrup for a different aroma and a slightly thinner texture.
- Old-fashioned oats: Toasted oats give a toasty, chewy bite, but quick oats can be used for a softer crumb if you’re in a hurry—expect less texture.
- Bread flour: High-gluten bread flour gives the best structure, but all-purpose can work if you’re out—your loaf might be a touch softer and less elastic.
- Yeast: Active dry yeast is reliable, but instant yeast can be mixed directly into dry ingredients—just adjust proofing time slightly.
- Salt: Sea salt or kosher salt can be used, but reduce quantity slightly if using coarse salt to avoid overly salty bites.
- Water: Tap water is fine, but adding a splash of milk during mixing can enhance softness and richness—try it for a tender crumb.
- Seeds (optional): Sunflower, flax, or sesame seeds add crunch and visual interest. Omit if you prefer a plain crust, or try chopped nuts for a different texture.
Equipment & Tools
- Large mixing bowl: To combine and knead the dough.
- Wooden spoon or dough hook: For mixing and initial kneading.
- Loaf pan (8×4 inch): Shape and support the bread during baking.
- Kitchen towel or plastic wrap: Cover the dough during rising.
- Oven: To bake the bread.
- Wire rack: To cool the bread evenly after baking.
Step-by-step guide to honey oat bread
- Gather your equipment: a large mixing bowl, a wooden spoon or dough hook, a loaf pan (8×4 inch), and a kitchen towel or plastic wrap.
- In the bowl, combine 1 1/2 cups warm water (about 38°C/100°F) with 2 teaspoons active dry yeast. Let sit for 5 minutes until frothy, smelling slightly yeasty and fresh.
- Add 2 tablespoons honey and 2 tablespoons melted butter to the yeast mixture. Stir until well combined. This mixture should smell sweet and yeasty, with a slight shimmer from the honey.
- In a separate bowl, mix 3 cups bread flour, 1 cup rolled oats, and 1 teaspoon salt. Stir to evenly distribute.
- Gradually add the dry ingredients to the wet mixture, stirring with a wooden spoon or dough hook on low speed. When it becomes too stiff, switch to kneading by hand or use the dough hook until the dough is cohesive but slightly sticky, about 8 minutes.
- Transfer the dough to a lightly floured surface and knead briefly for 1-2 minutes, just to incorporate any remaining flour. It should be soft but elastic, with a slight bounce when pressed.
- Shape the dough into a tight ball and place it in your greased loaf pan. Cover loosely with a damp towel or plastic wrap. Let rise in a warm spot (around 24°C/75°F) for 1 to 1.5 hours, until it has doubled in size and feels puffy to the touch.
- Preheat your oven to 190°C (375°F). When the dough has doubled, remove the cover and sprinkle a few extra oats or seeds on top if desired. Bake in the middle rack for 30-35 minutes, until the crust is golden and firm.
- Check for doneness: the loaf should sound hollow when tapped, and the crust should be deep golden. The internal temperature should reach about 88°C (190°F).
- Remove the bread from the oven and let it cool in the pan for 10 minutes. Then transfer to a wire rack, and cool completely before slicing to prevent squishing the crumb.
- Let the bread rest for at least 20 minutes before slicing. This allows the crumb to set and enhances flavor development.
Allow the bread to cool completely on a wire rack before slicing. Resting helps the crumb set and prevents it from becoming gummy. Slice with a serrated knife, starting from the side, and enjoy fresh or toasted.
How to Know It’s Done
- Loaf sounds hollow when tapped on the bottom.
- Crust is deep golden and firm to the touch.
- Internal temperature reaches approximately 88°C (190°F).
Honey Oat Bread
Ingredients
Equipment
Method
- In a large mixing bowl, pour the warm water and sprinkle the yeast over it. Let sit for 5 minutes until the mixture is foamy and smells yeasty—this indicates the yeast is active.
- Add the honey and melted butter to the yeast mixture, stirring gently until combined. You should notice a slight shimmer from the honey and a sweet aroma filling the bowl.
- In a separate bowl, whisk together the bread flour, toasted oats, salt, and optional seeds. This helps distribute the ingredients evenly.
- Gradually add the dry ingredients to the wet mixture, stirring with a wooden spoon or using a dough hook on low speed. Mix until the dough begins to come together and pulls away from the sides of the bowl.
- Transfer the dough onto a lightly floured surface and knead for about 8 minutes until it becomes smooth, elastic, and slightly tacky to the touch. The oats will add a chewy texture.
- Shape the dough into a tight ball and place it into a greased loaf pan. Cover loosely with a damp towel or plastic wrap and let rise in a warm spot for about 1 to 1.5 hours, until doubled in size and puffy.
- Preheat your oven to 190°C (375°F). Once the dough has risen, sprinkle extra oats or seeds on top if desired, then place the loaf pan in the oven.
- Bake for 30 to 35 minutes until the crust is deep golden and sounds hollow when tapped. The aroma of toasted oats and honey will fill your kitchen.
- Remove the bread from the oven and transfer it to a wire rack. Let cool completely for at least 20 minutes; this helps the crumb set and prevents gummy slices.
- Once cooled, slice with a serrated knife and enjoy the warm, hearty texture and sweet aroma of your homemade honey oat bread.
Notes
Tips and Tricks for Perfect Honey Oat Bread
- Toast oats lightly before mixing for a nutty aroma and richer flavor.
- Use a digital thermometer to ensure water is around 38°C (100°F) for optimal yeast activation.
- When kneading, aim for a smooth, slightly elastic dough that feels tacky but not sticky.
- Cover the dough with a damp towel during rising to prevent drying out and develop a better crust.
- Bake in the middle rack for even heat distribution and a golden crust, about 30-35 minutes.
- If crust browns too quickly, tent with foil to prevent burning while the inside finishes baking.
- Cool the bread completely on a wire rack before slicing to avoid gummy texture and crumb collapse.
Common mistakes and how to fix them
- FORGOT to proof yeast → Ensure yeast is frothy before mixing.
- DUMPED too much flour → Measure flour accurately to prevent dense bread.
- OVER-TORCHED crust → Bake at correct temperature and cover if browning too fast.
- FAILED to let bread cool → Always cool completely to set the crumb and avoid gummy slices.
Quick Fixes for Honey Oat Bread
- If bread cracks excessively, reduce oven temperature slightly and cover with foil.
- When dough is too sticky, dust with a bit more flour during kneading.
- Splash cold water on crust if it darkens too fast—shields from over-browning.
- Patch a collapsed loaf by gently reshaping and letting it rise again briefly.
- DUMPED too much salt? Rinse the dough lightly and start over with less salt to avoid overpowering flavor.
Prep, store, and reheat tips
- You can prep the dough up to 24 hours in advance; let it rise slowly in the fridge for enhanced flavor and texture. The chilled dough develops a deeper, more complex aroma.
- Store baked bread at room temperature wrapped in a clean towel or paper bag for up to 2 days. The crust stays crisp, and the crumb remains soft and fragrant.
- For longer storage, slice the bread and freeze in an airtight container or zip-top bag for up to 3 months. Toast slices directly from frozen for a warm, oven-fresh feel.
- Reheat slices in a 180°C (350°F) oven for 5-8 minutes until warm and fragrant, or microwave for 20-30 seconds. Expect a cozy aroma and a slightly chewy crust when reheated properly.
Top questions about honey oat bread
1. Can I use quick oats instead of old-fashioned oats?
Yes, you can use quick oats, but the bread will be softer and less chewy. It won’t have that hearty texture, but it’ll still taste good.
2. Can I substitute honey with other sweeteners?
Absolutely. Using honey substitutes like maple syrup or agave nectar will alter the flavor slightly but keep the bread sweet and moist.
3. What if my bread doesn’t rise?
If your bread isn’t rising well, check if your yeast is fresh and proof it properly. Warm, not hot, water helps activate the yeast.
4. How should I store honey oat bread?
Store leftover bread in a paper bag at room temperature for 1-2 days. For longer storage, freeze slices and toast directly from frozen.
5. Can I add seeds or nuts?
Yes, adding seeds like sunflower or flax before baking adds crunch and visual appeal. Feel free to skip or try chopped nuts for a different texture.
6. How do I slice the bread properly?
Use a serrated bread knife to slice the bread gently. Wait until it’s fully cooled to avoid squishing the crumb and to get cleaner slices.
7. What if my crust gets too dark?
If the crust browns too fast, tent the loaf loosely with foil during the last 10 minutes of baking. It prevents over-browning while the inside finishes.
8. How do I get a good oven spring?
Ensure your oven is preheated properly, and don’t open the door during the first 20 minutes of baking. It helps the loaf rise evenly.
9. Why should I cool the bread before slicing?
Let the bread cool completely on a wire rack for at least 20 minutes after baking. This helps the crumb set and prevents gummy slices.
10. Can I modify the liquids in the recipe?
Adding a splash of milk or even a bit of melted butter during mixing can make the crumb softer and richer. Try different liquids to see what you like best.
Baking this honey oat bread is a little act of nostalgia, filling the house with a warm, toasty scent that makes everything feel calmer. It’s not about perfection but about the simple joy of kneading and waiting, watching the crust turn a deep amber. When you slice into it, the chewy oats and gentle sweetness remind you that sometimes the best things come from honest, unpolished effort.
In these busy moments, it’s nice to have a loaf that’s familiar in flavor and texture, a gentle reminder of home and slower mornings. Sharing a warm slice feels like passing on a quiet piece of that comfort, even if the day is chaos outside. This bread isn’t just food—it’s a small, sweet pause in an otherwise hectic day.